The best layout for Good Meal Factories?

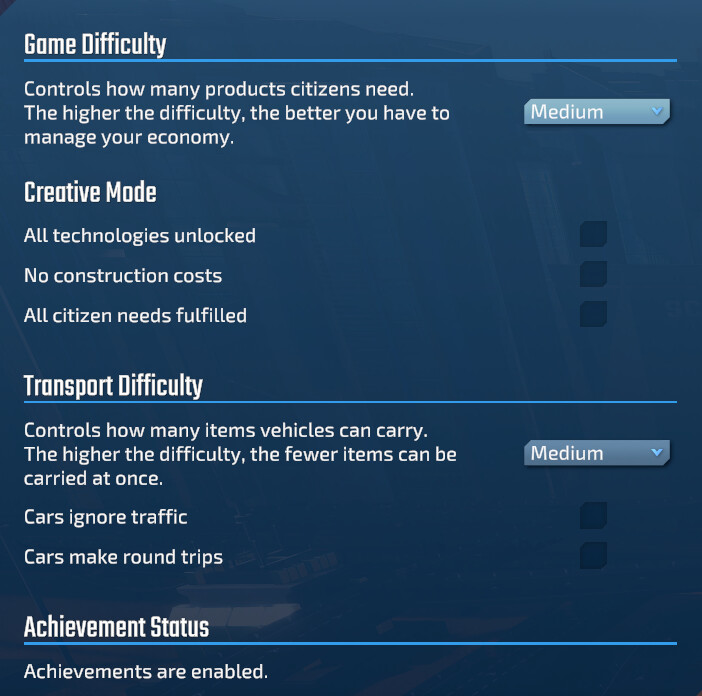
(Prenote/Update: my game has been running on Medium “Game Difficulty” and Medium “Transport Difficulty”, as such, some/all of my numbers are off or outright wrong. I will be doing some retesting and updating my estimates [mostly to test on Hard Difficulties]. But in general it looks like my traffic calculations need to be reduced by 50% due to the trucks being able to carry two resources per trip in my current game [as opposed to only one per trip on Hard]. Thanks to @BaYoNeTTe for the questions and info!)

Game settings for all screenshots and info below:
(See my reply below for full list of settings, traffic info, Meal Factory info, and Habitat info: Full Game Settings Info)

(Original Post Below:)
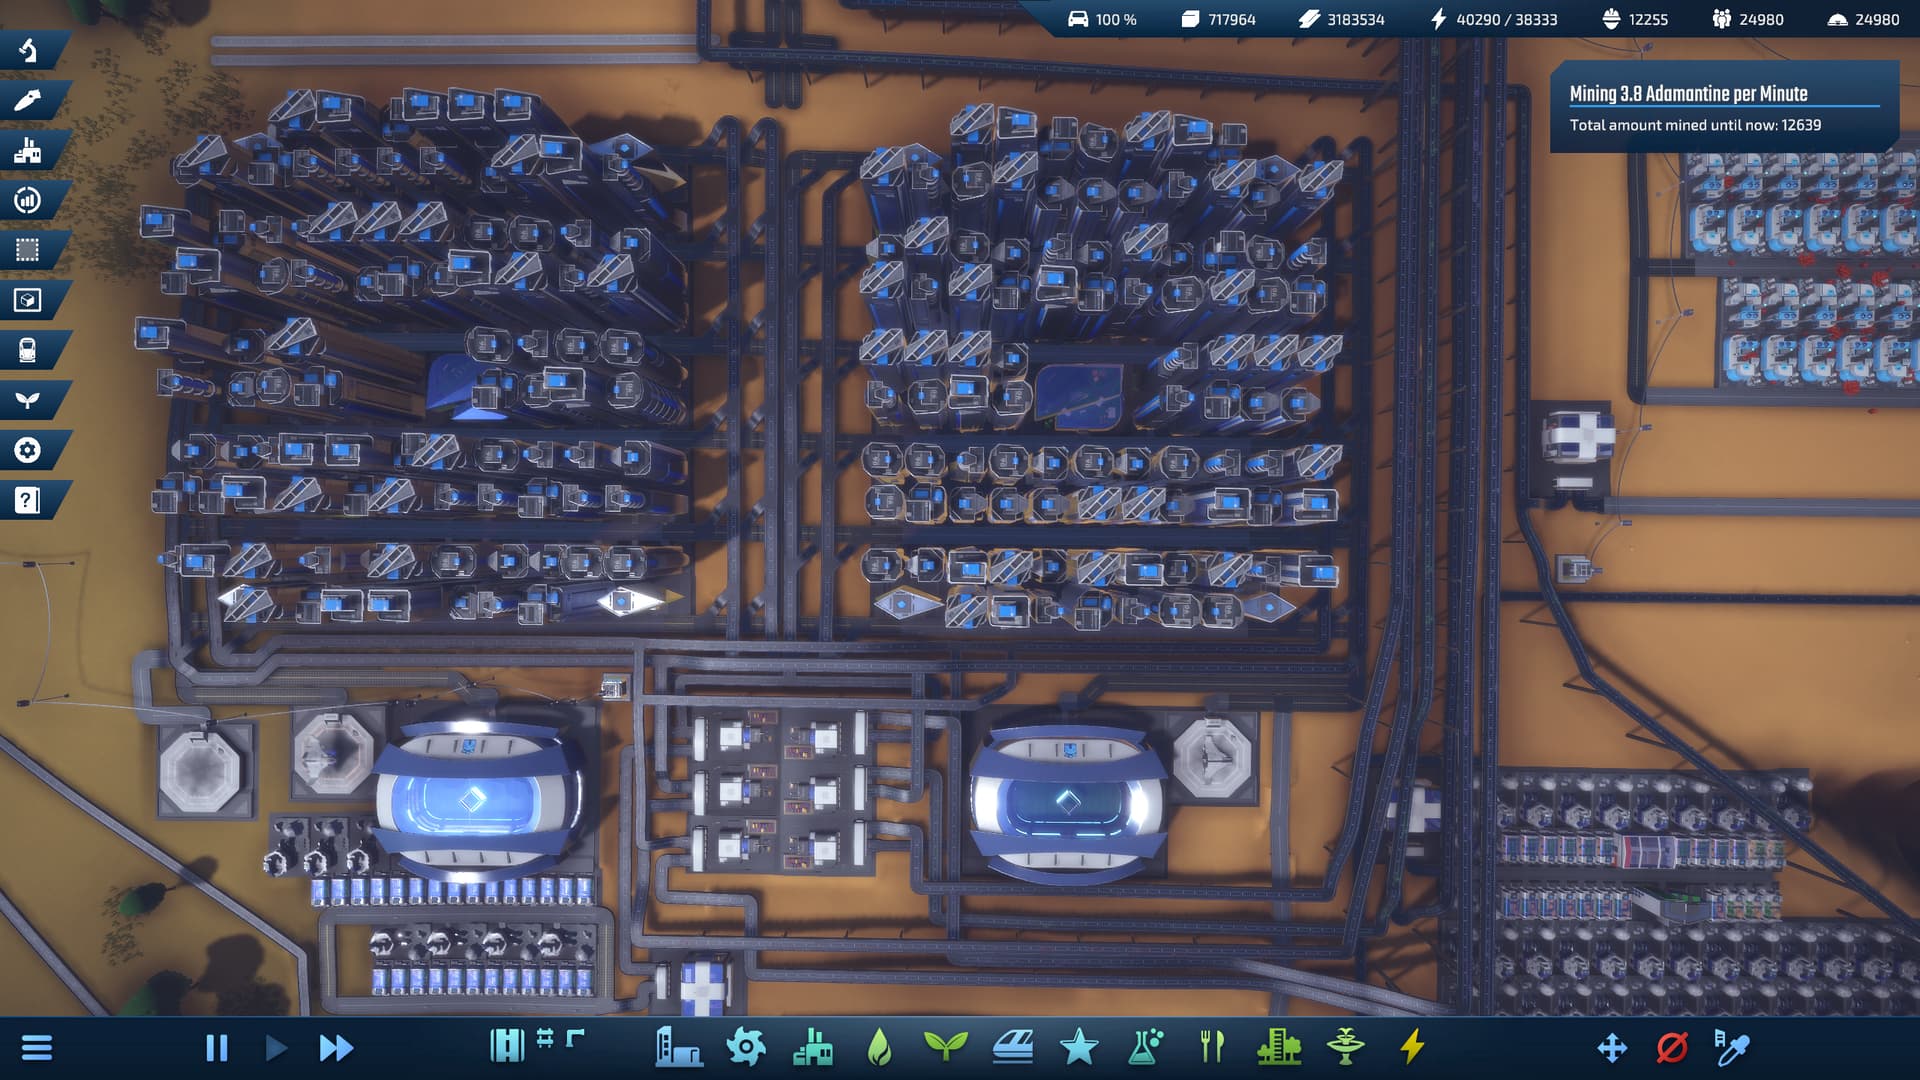
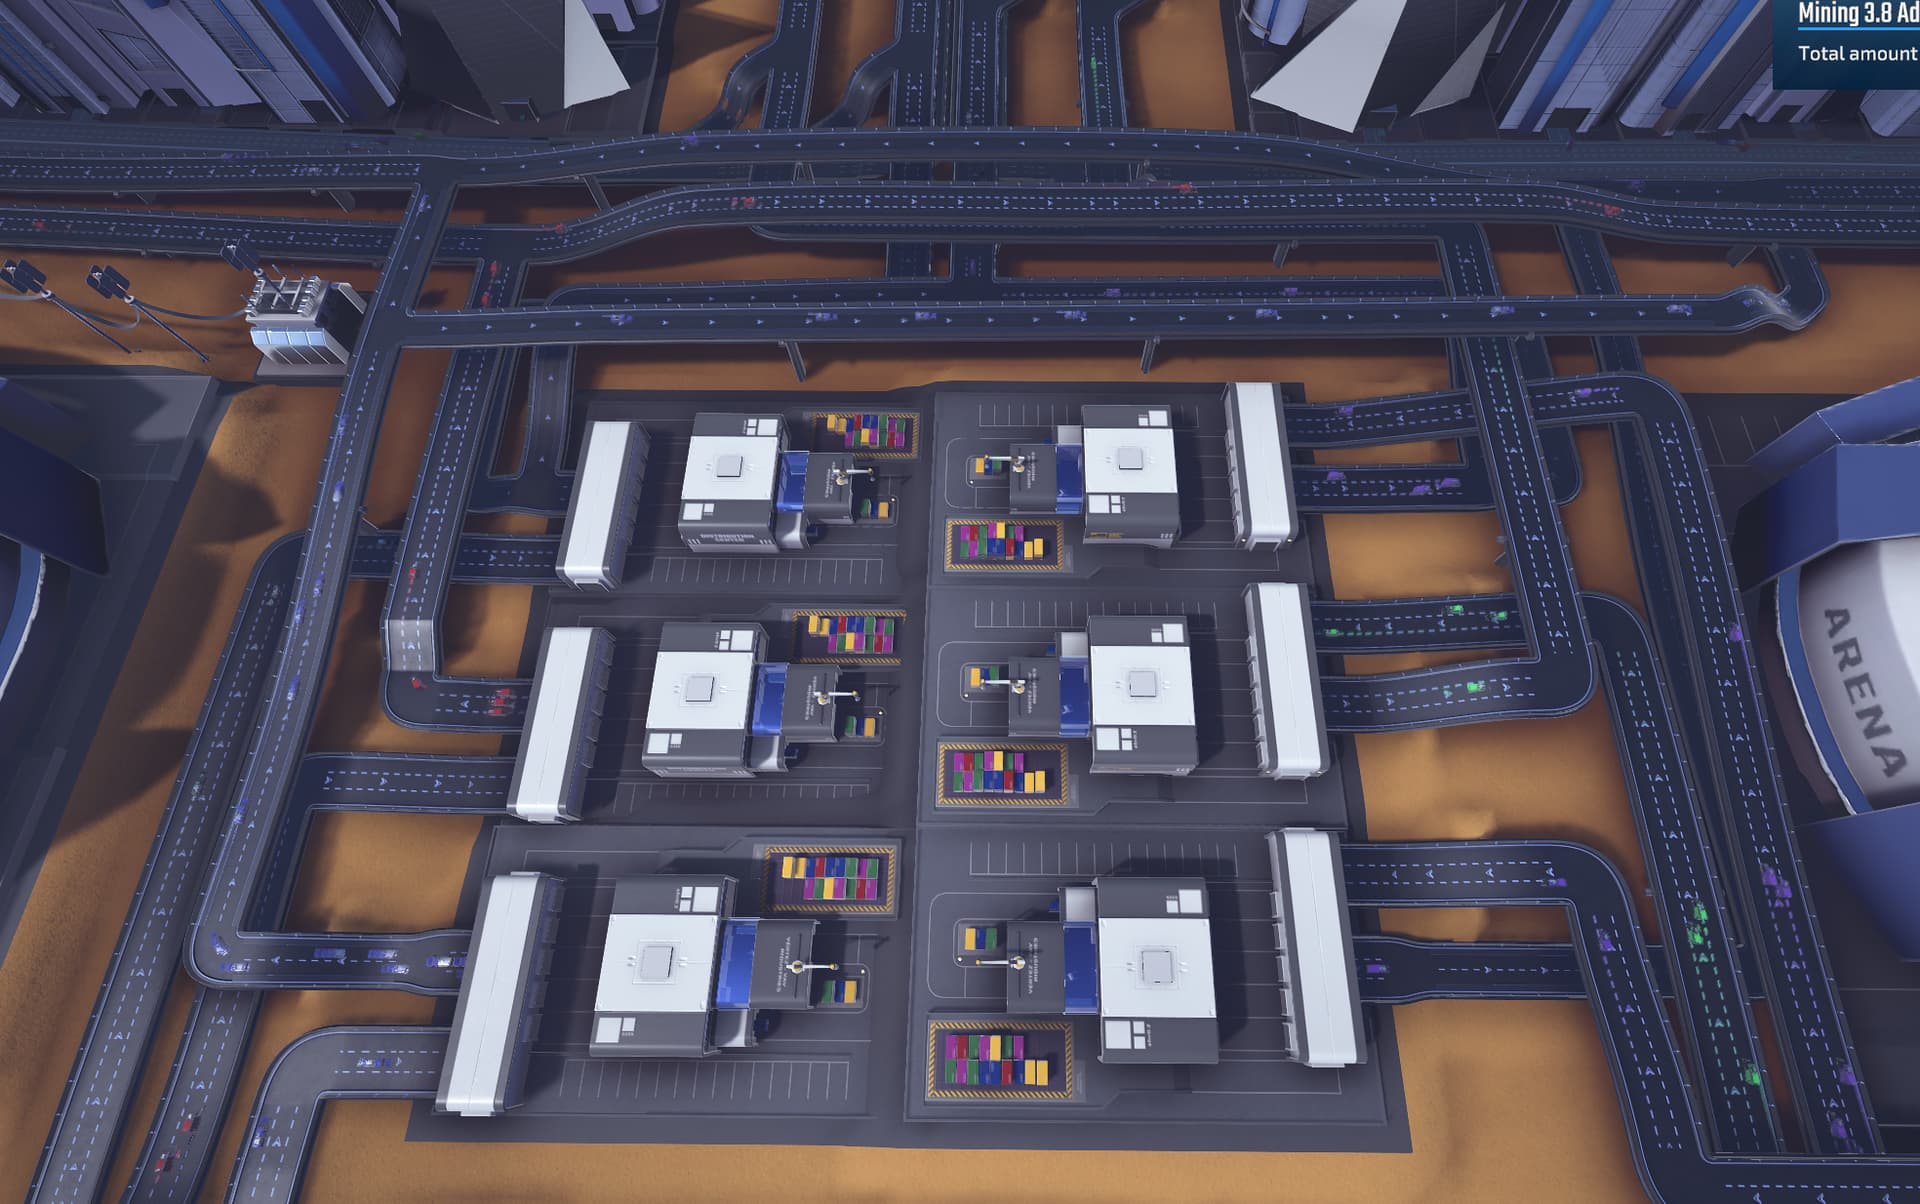
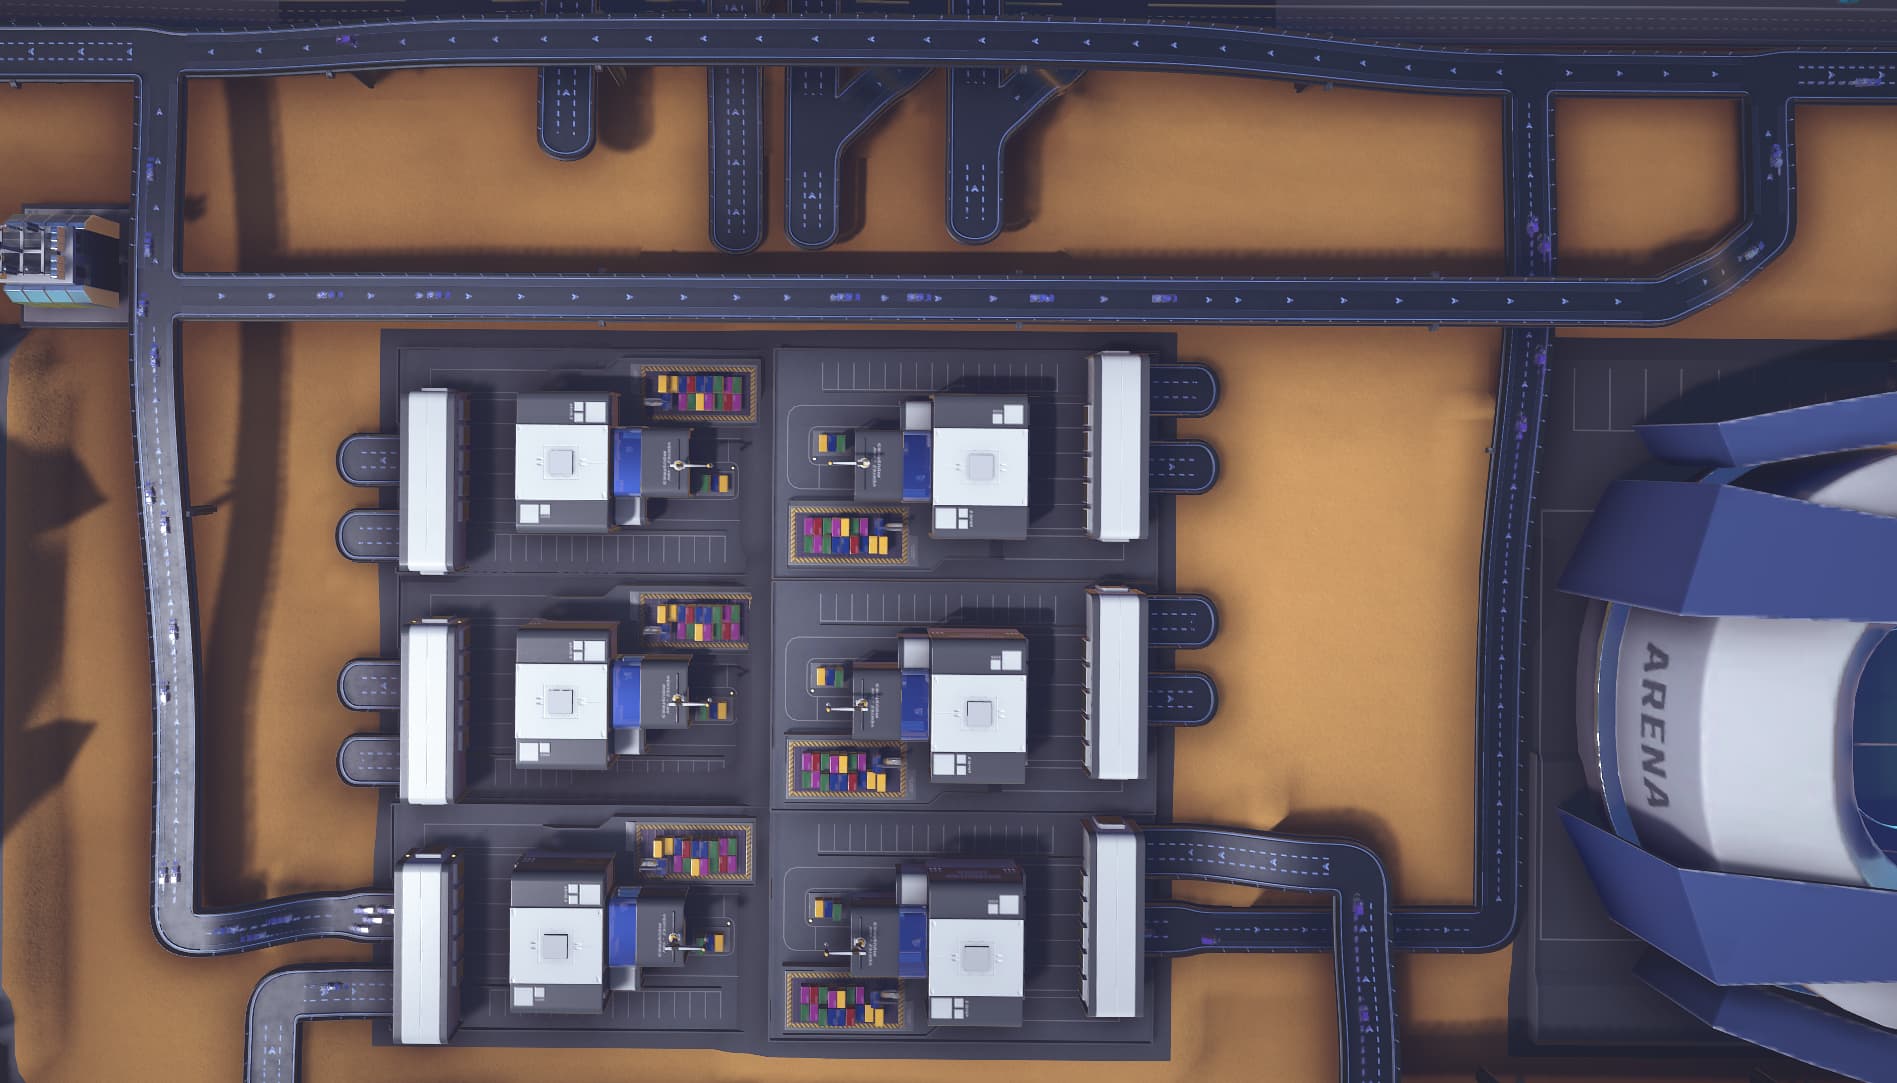
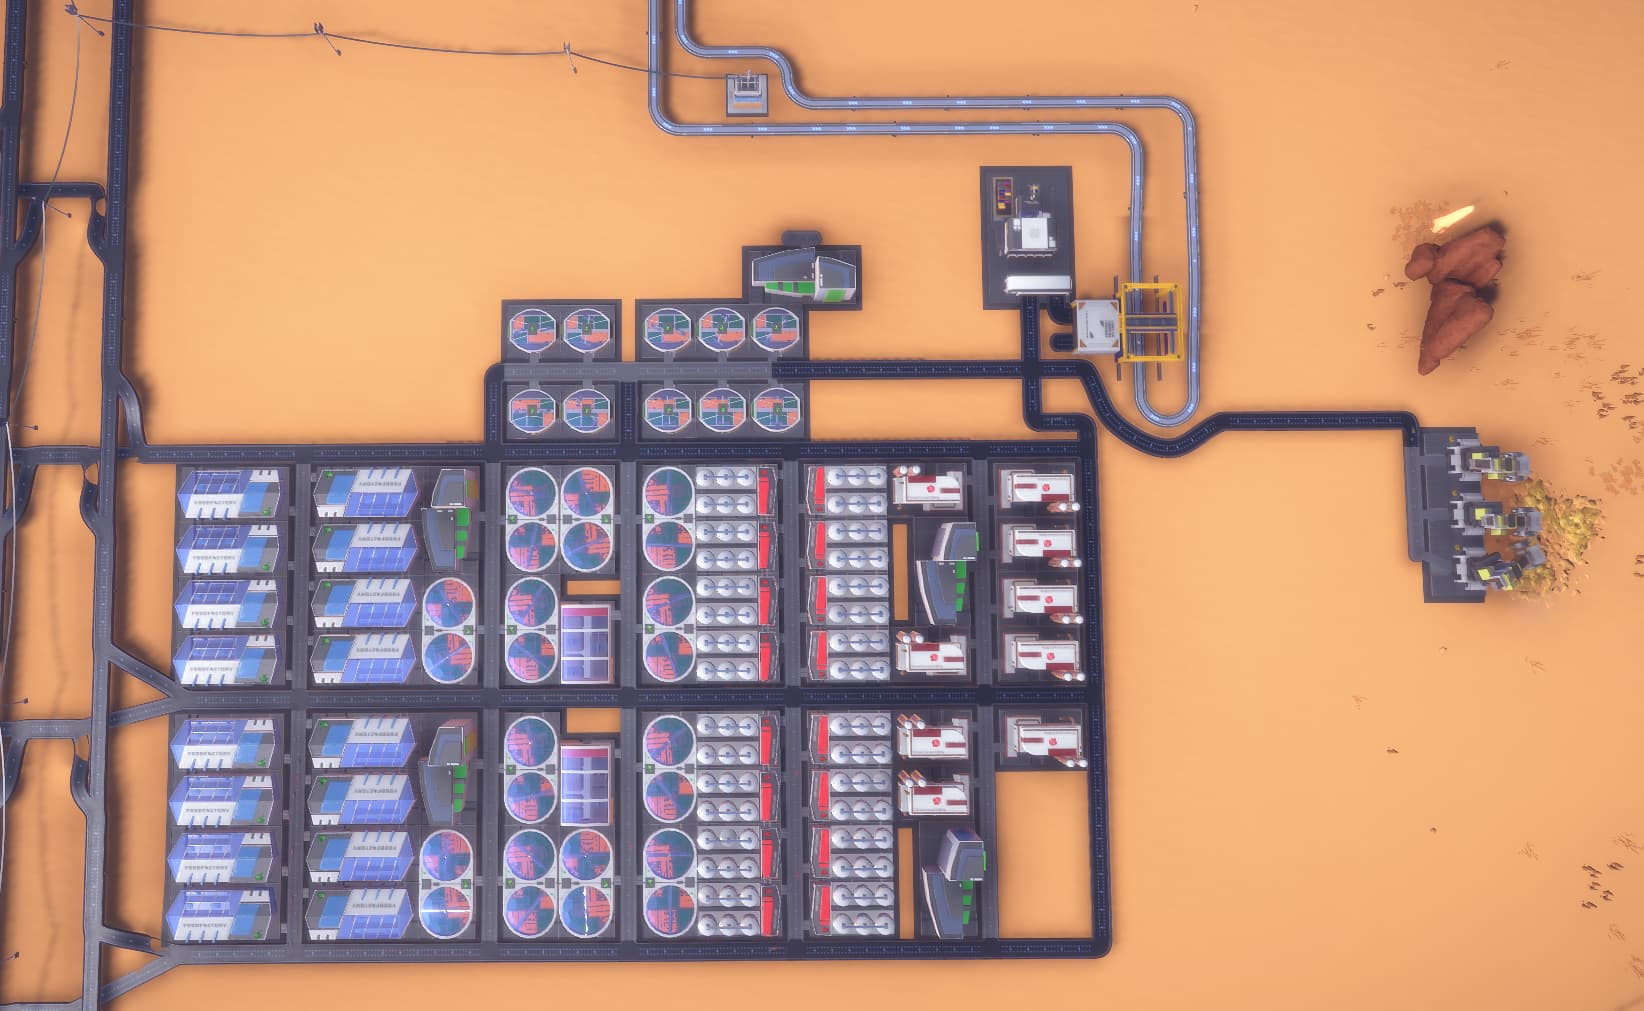
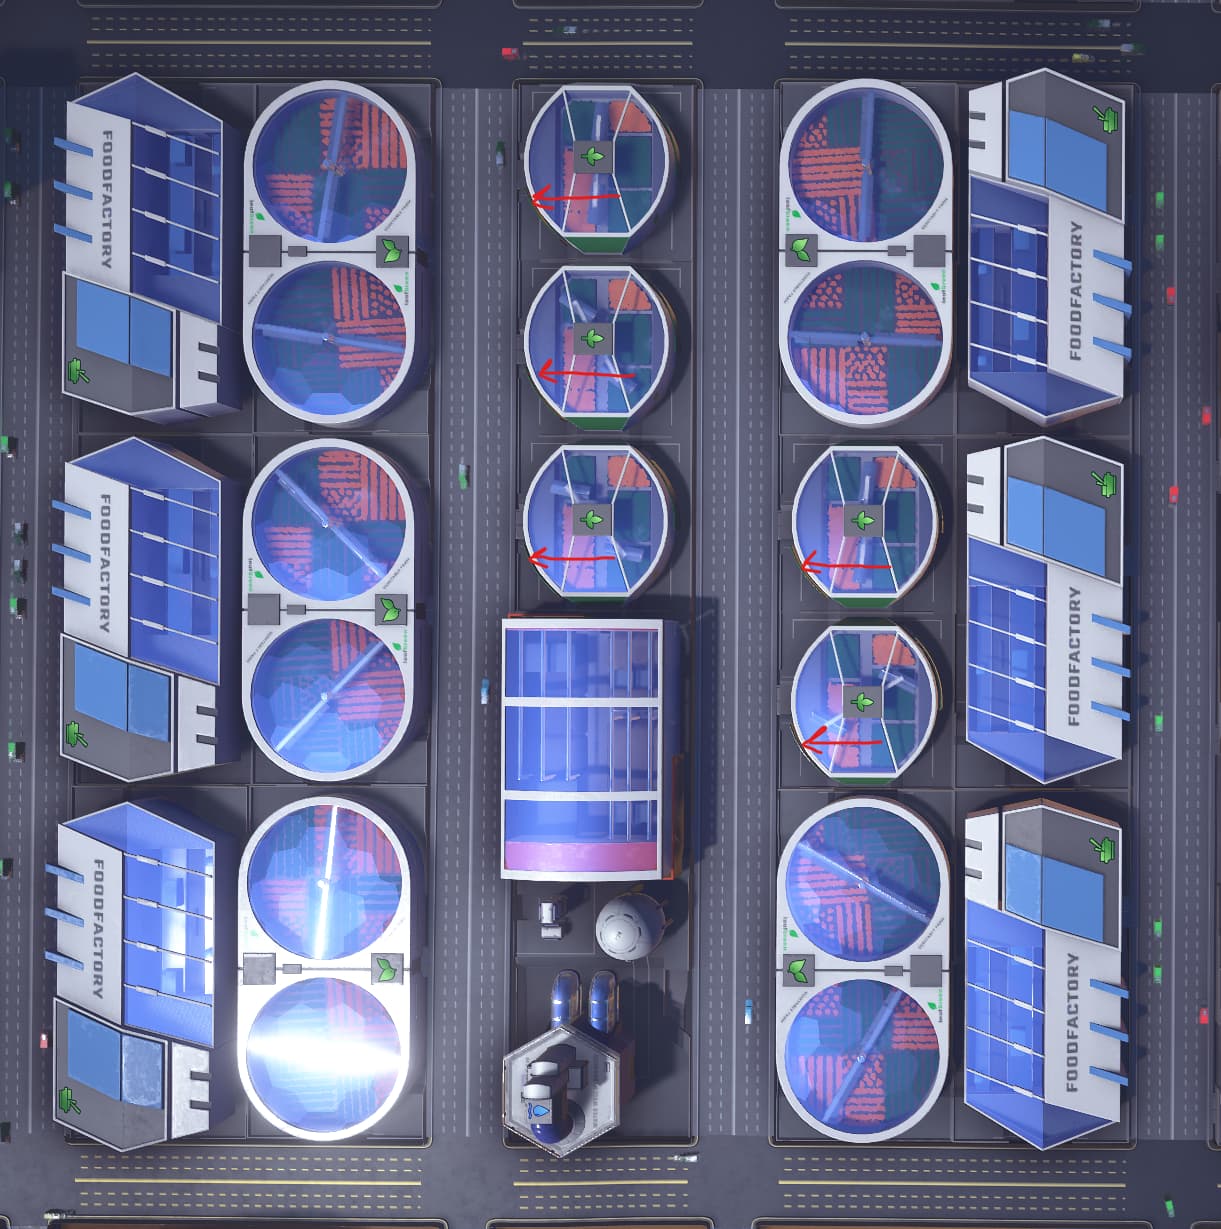
I have been trying to figure out the best/most efficient layout for my Good Meal Factory zones, this link with a screenshot is the basis for my newest effort: Layout: Good Meal (This layout does not include Recycling Centers, nor Soil Enrichment Facilities.)

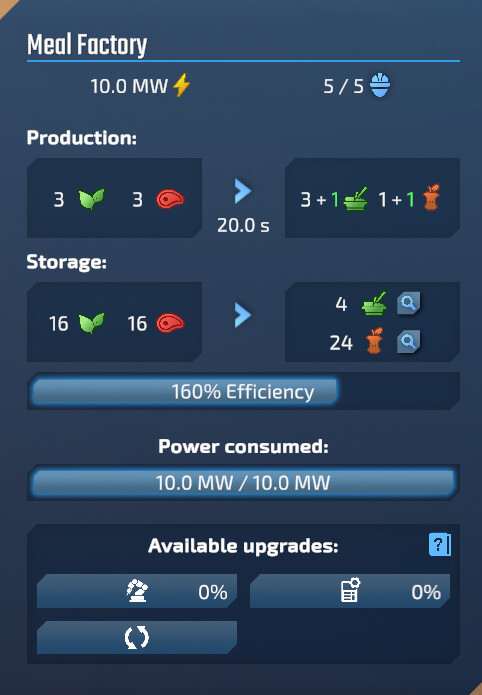
My current layout works at least for the end game with the bonus production Meal Factory (+1 Good Meal) for completing the Passenger Deck with the Space Ship reconstruction (through the Space Ship Construction Facility.) The other bonuses that affect the rest of the meal resources only benefit the Organic Waste so are not required for the maximum throughput.

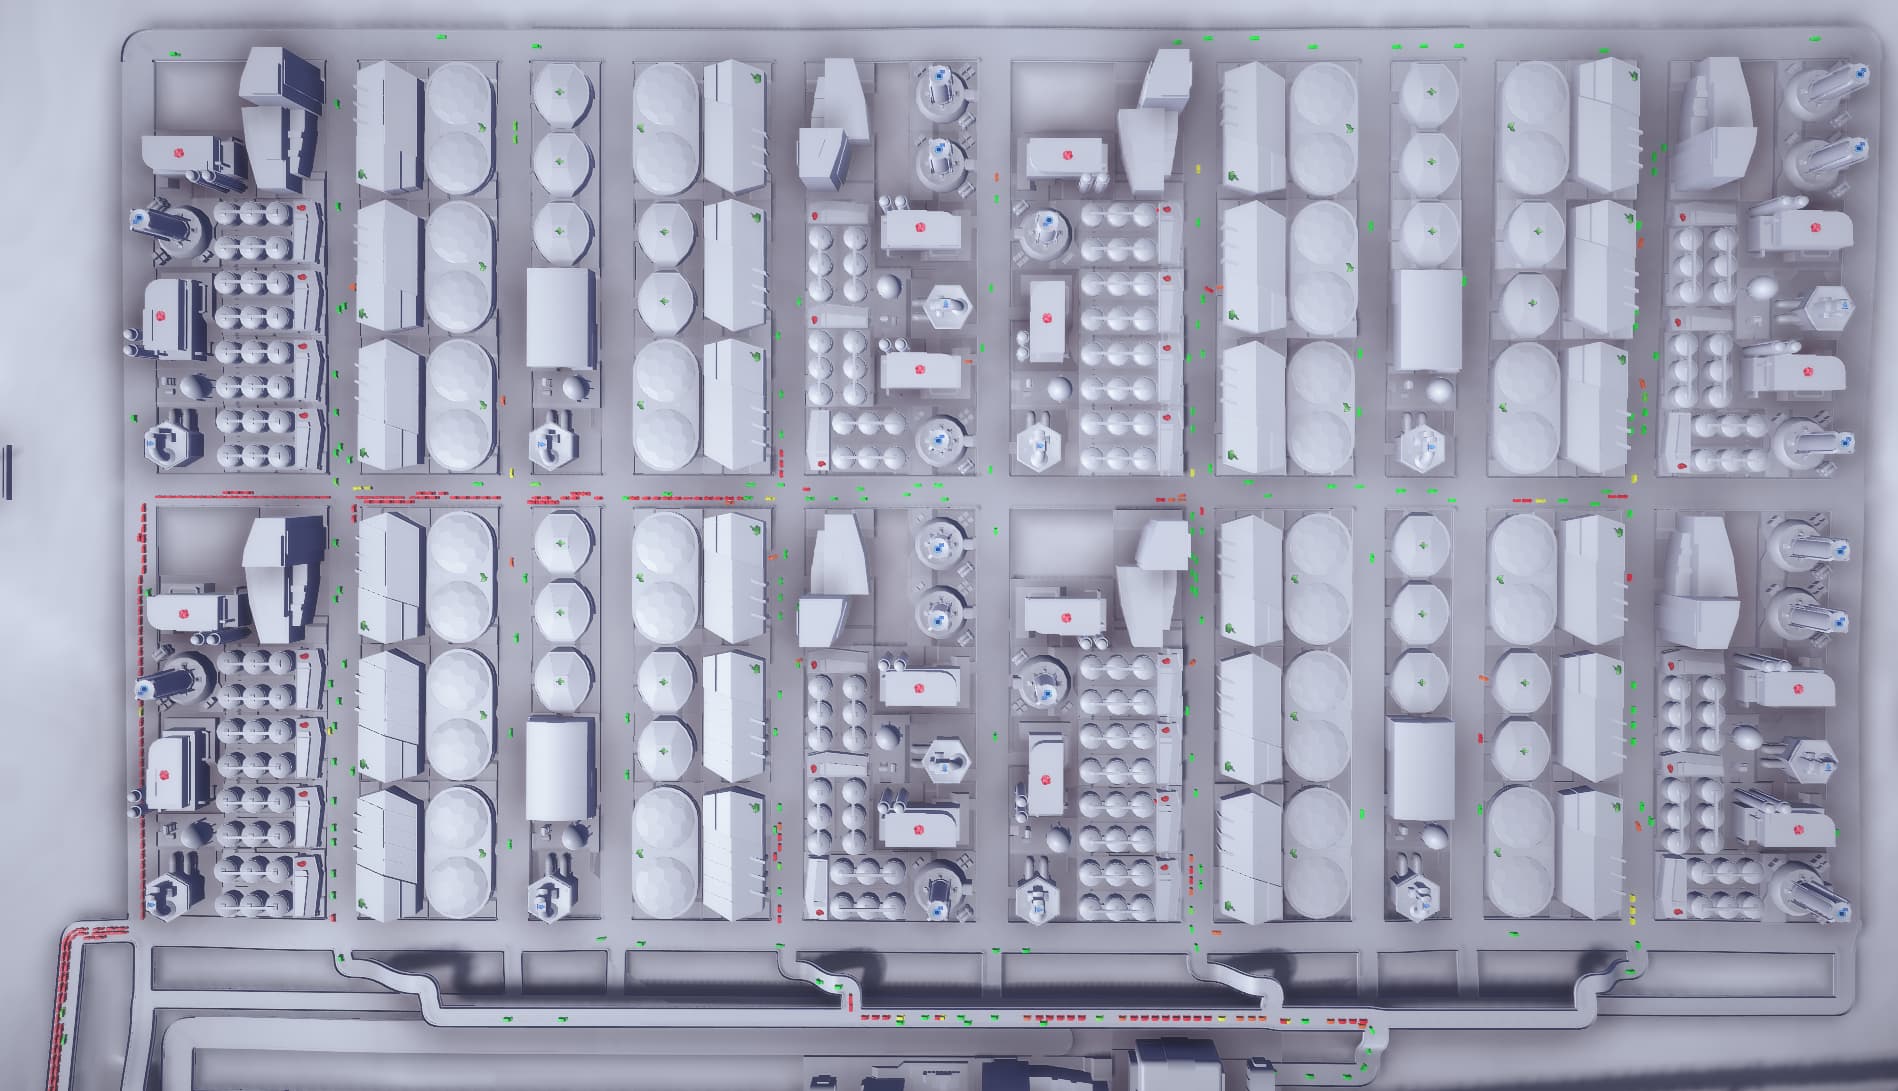
Current version for my Good Meal Factory area layout:

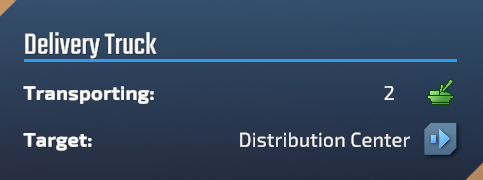
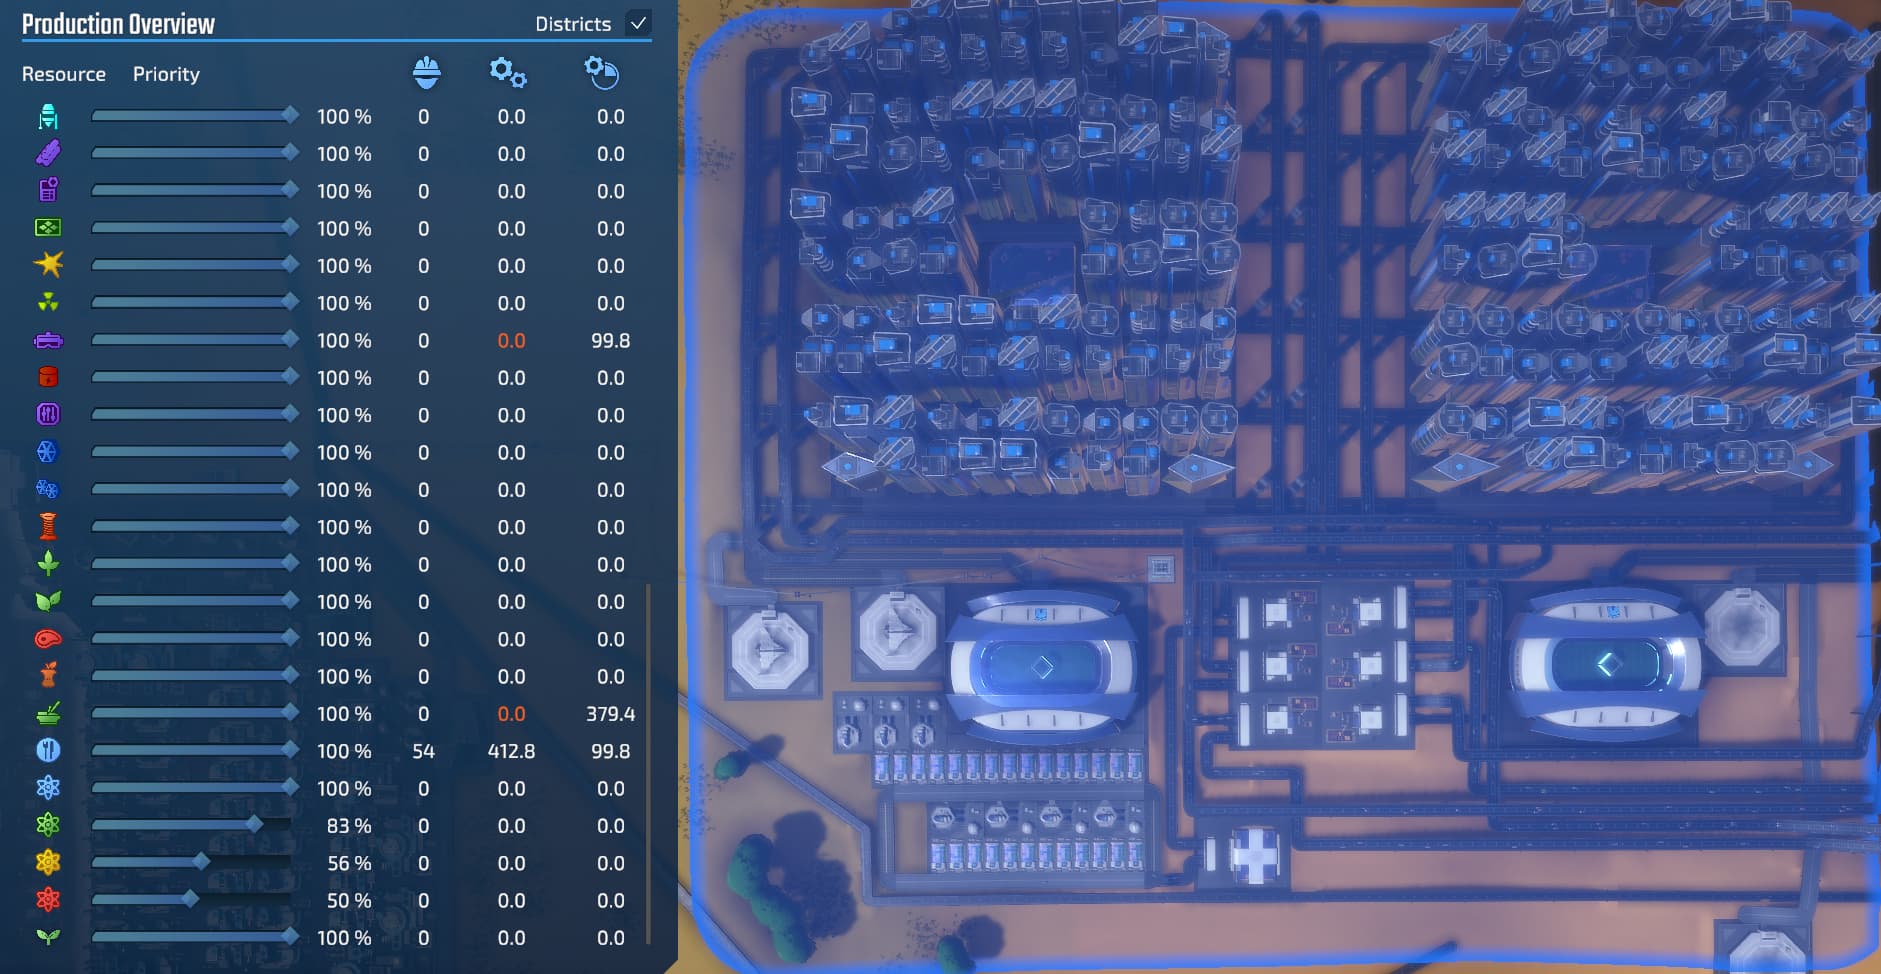
Each “block” of this layout produces ~104 Good Meals, so 4x “blocks” = ~410 Good Meals. Which is enough to fully provide for 2x of my Habitat Blocks as described below (192 max lvl Habitat Buildings; the Luxury Residential Highrises.). This entire 4x Good Meal zone can be collected by 1x Collection Center without traffic jams. (I think trying to increase this 4x zone beyond 4x will induce some gridlock especially if trying to send into one Collection Center.)

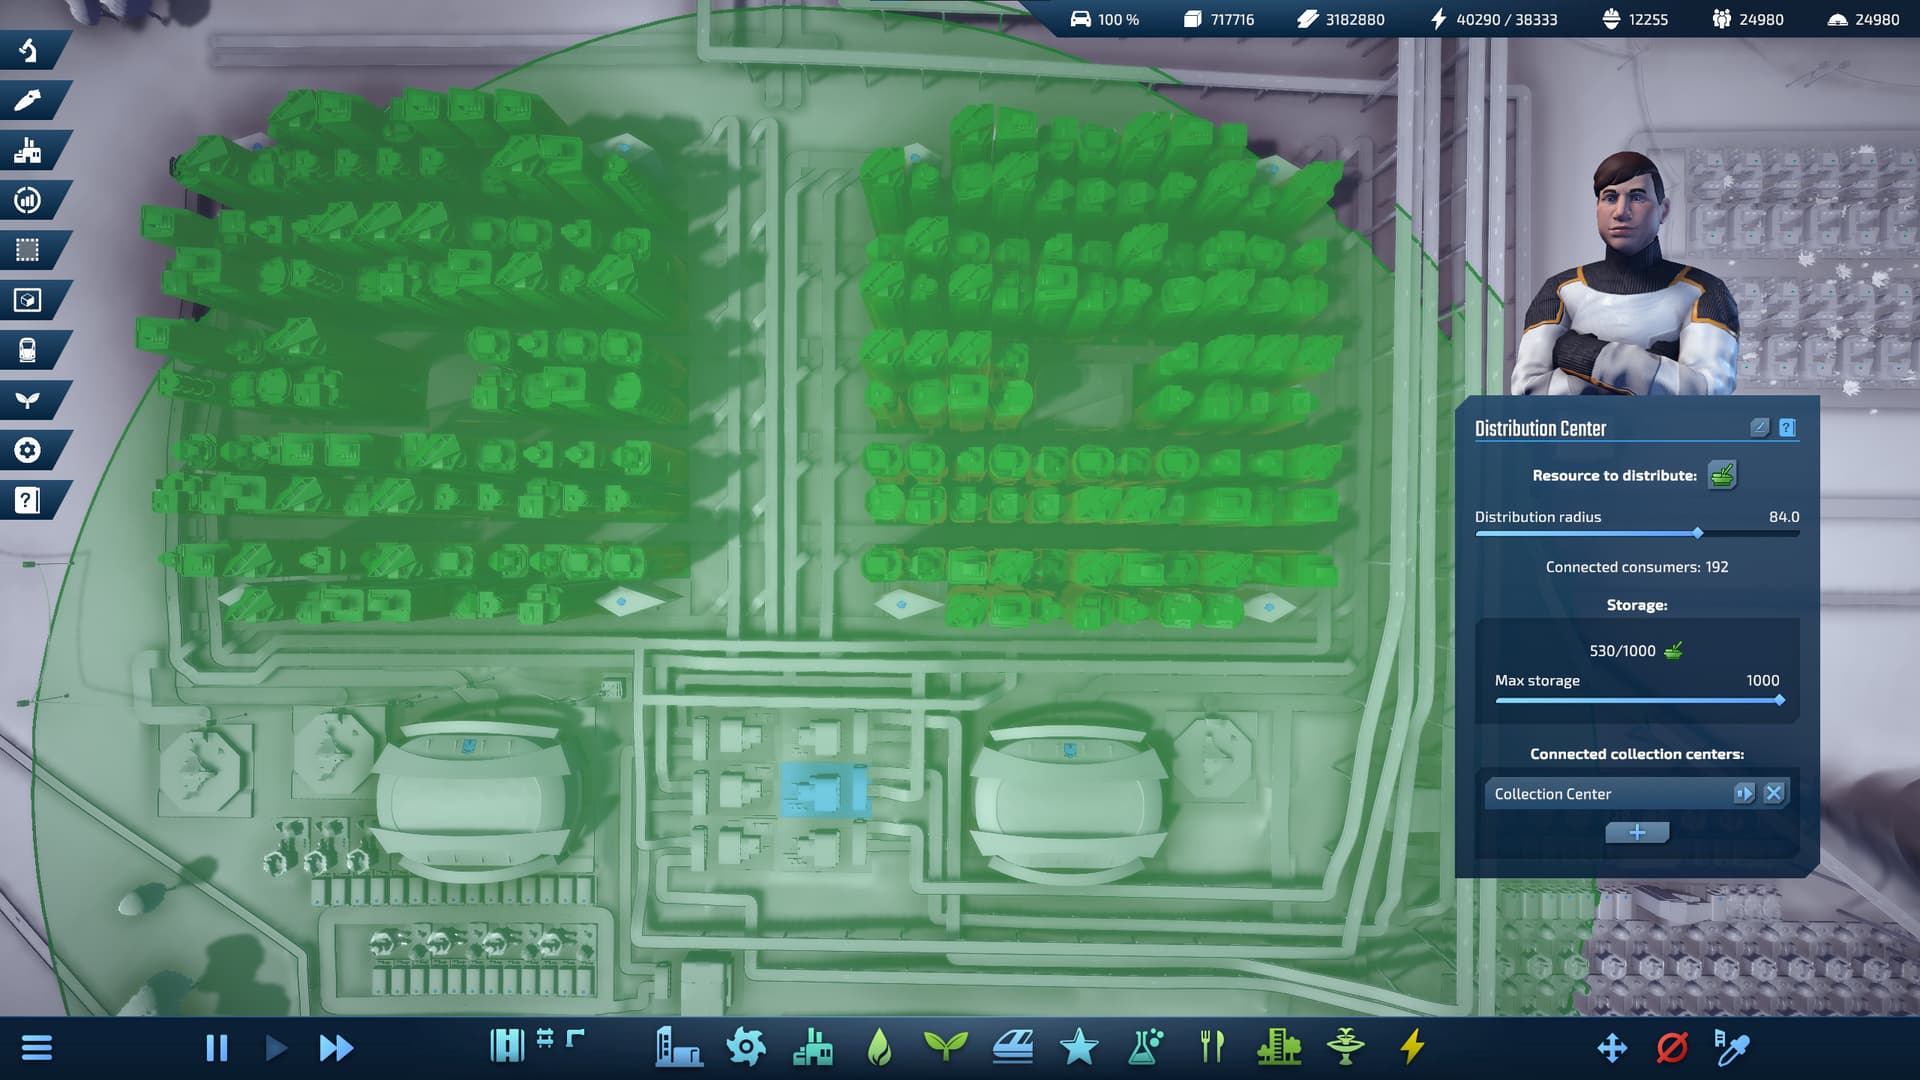
(Side note, here is the link to another topic about Collection Centers/Distribution Centers if you are having issues, or have any questions about how to use them): The Way Distribution Centers Work

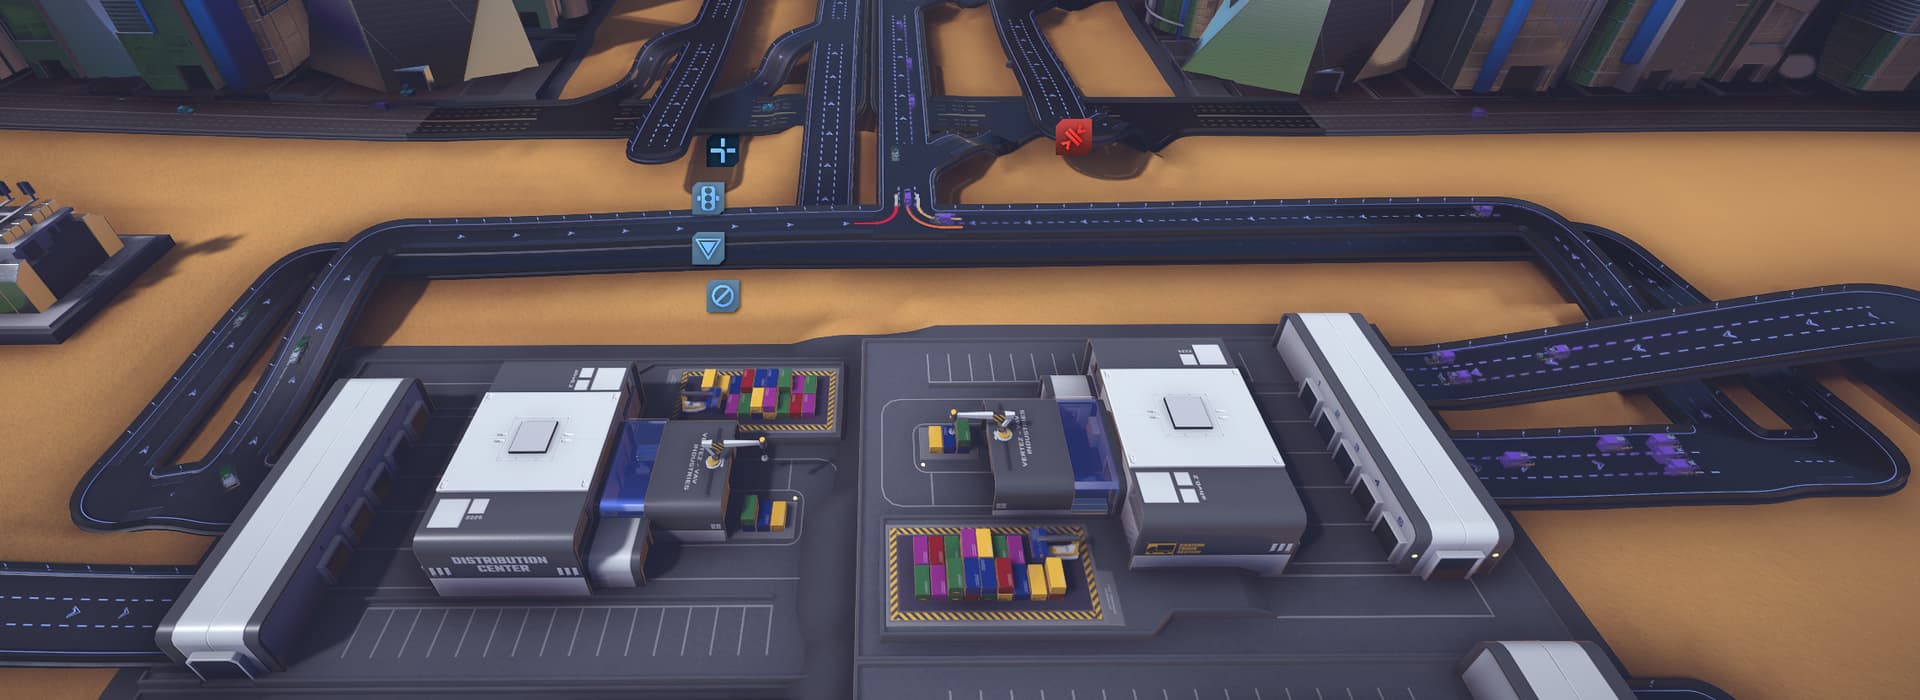
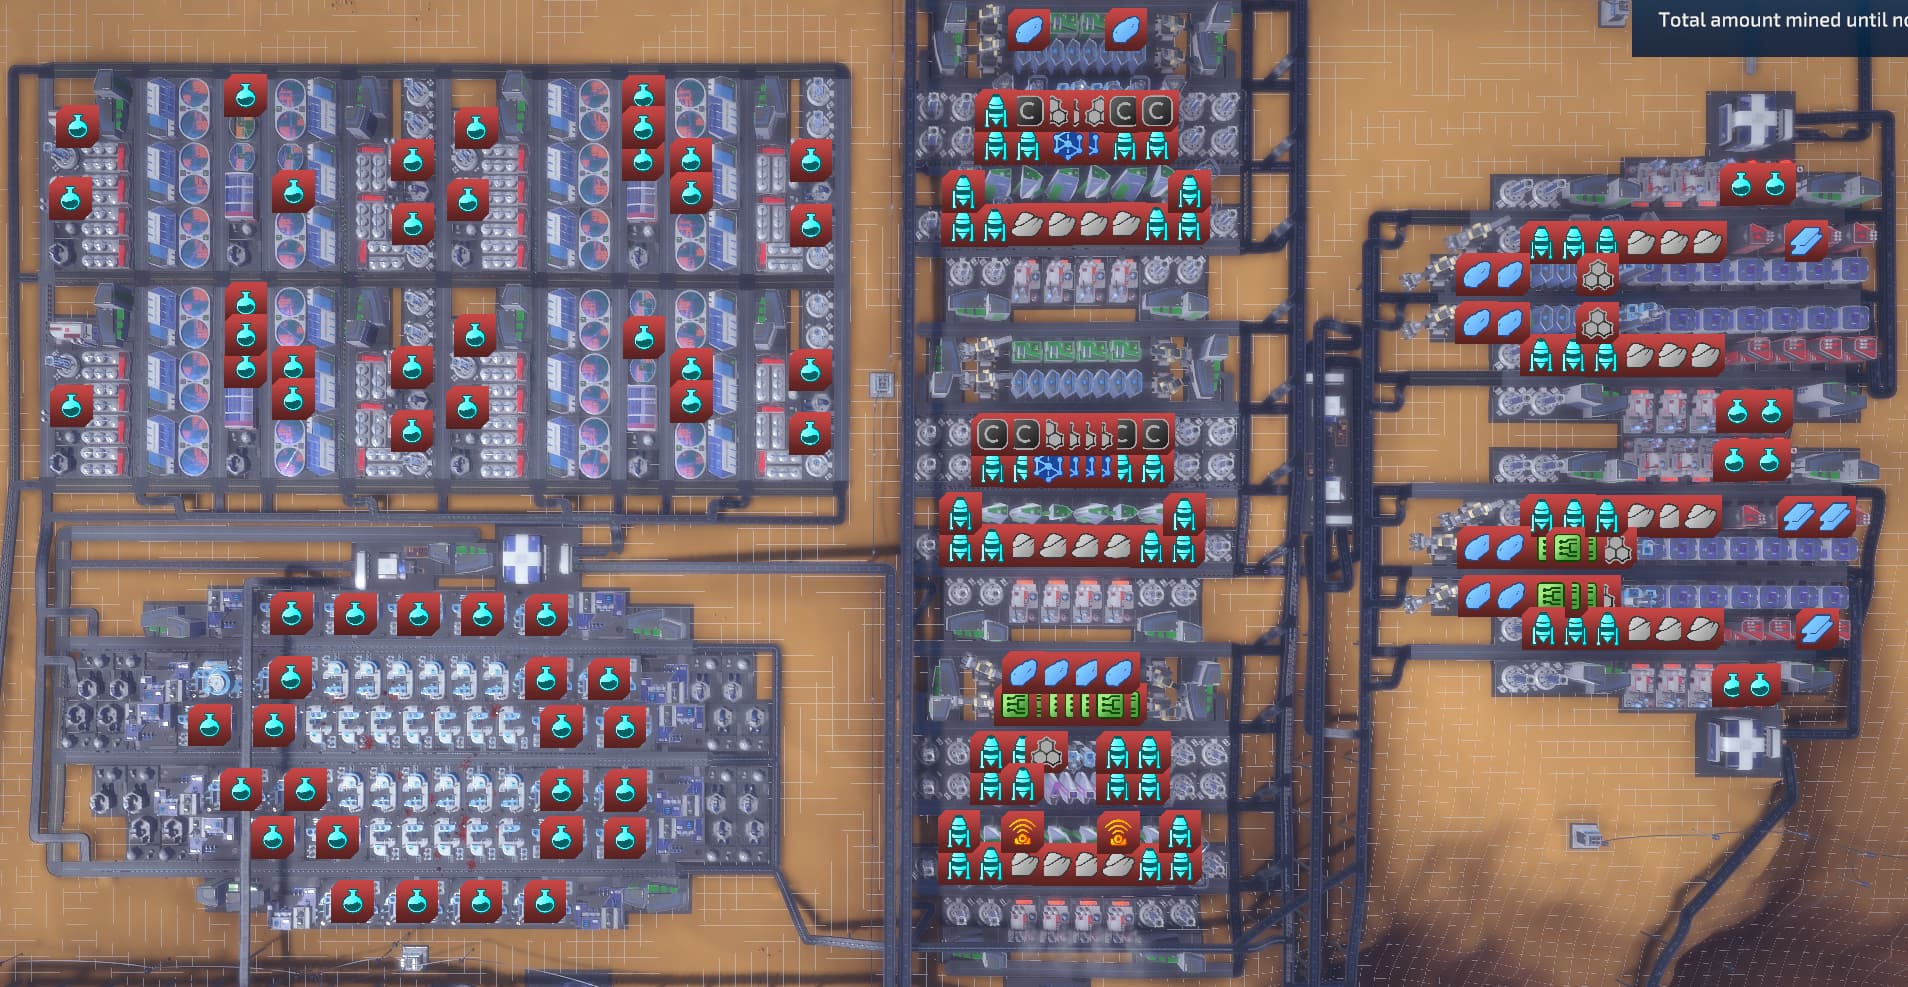
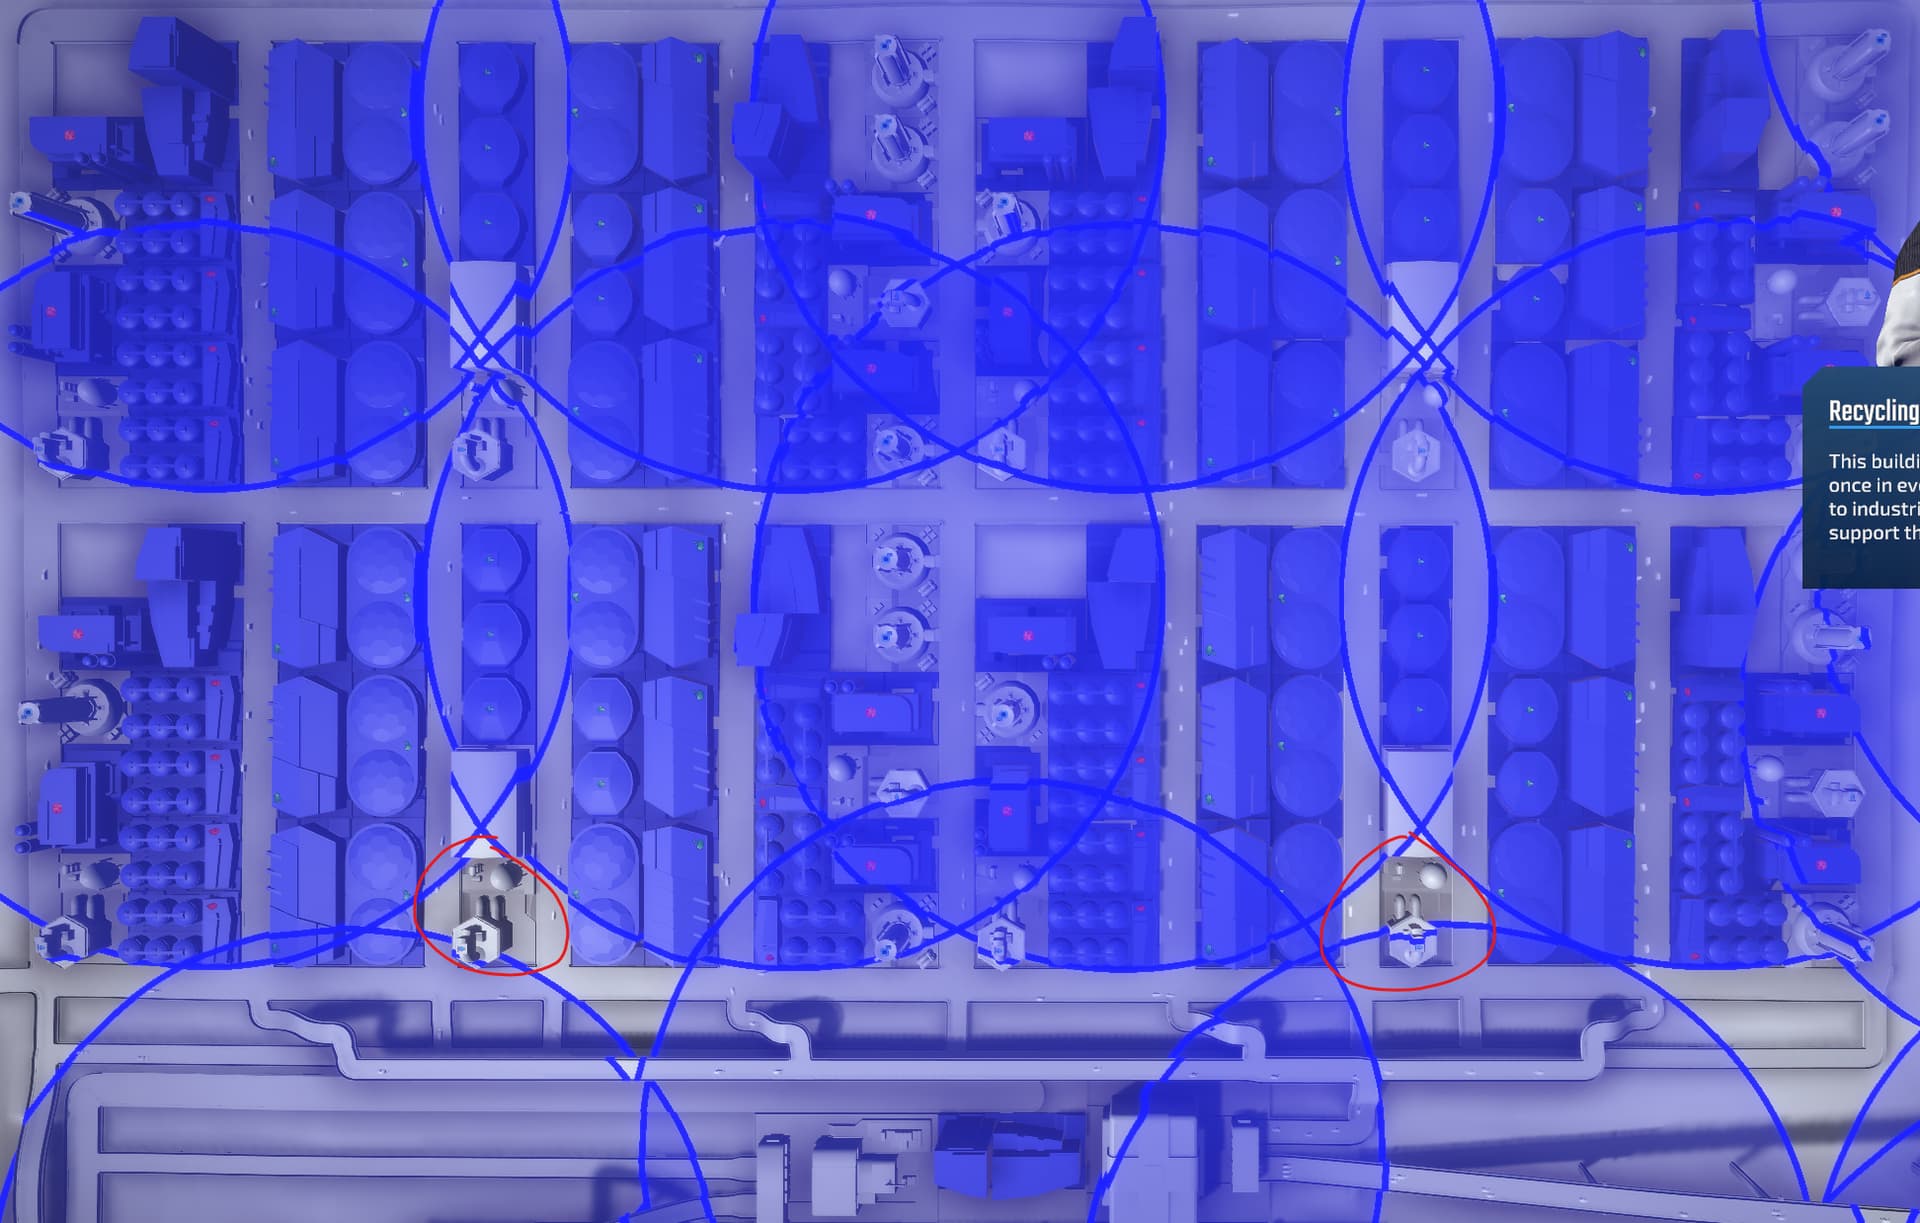
Recycling Center reach: (Note that the Ground Water Extractors and Oxygen Processors do not need to be in the Recycling Center’s field of reach, and is why I have the two circled Ground Water Extractors in that location to avoid needing an extra 2x Recycling Centers at the lower/beginning edge. This also means that the Water and Oxygen buildings can be moved around with more freedom when trying to optimize this layout further.)

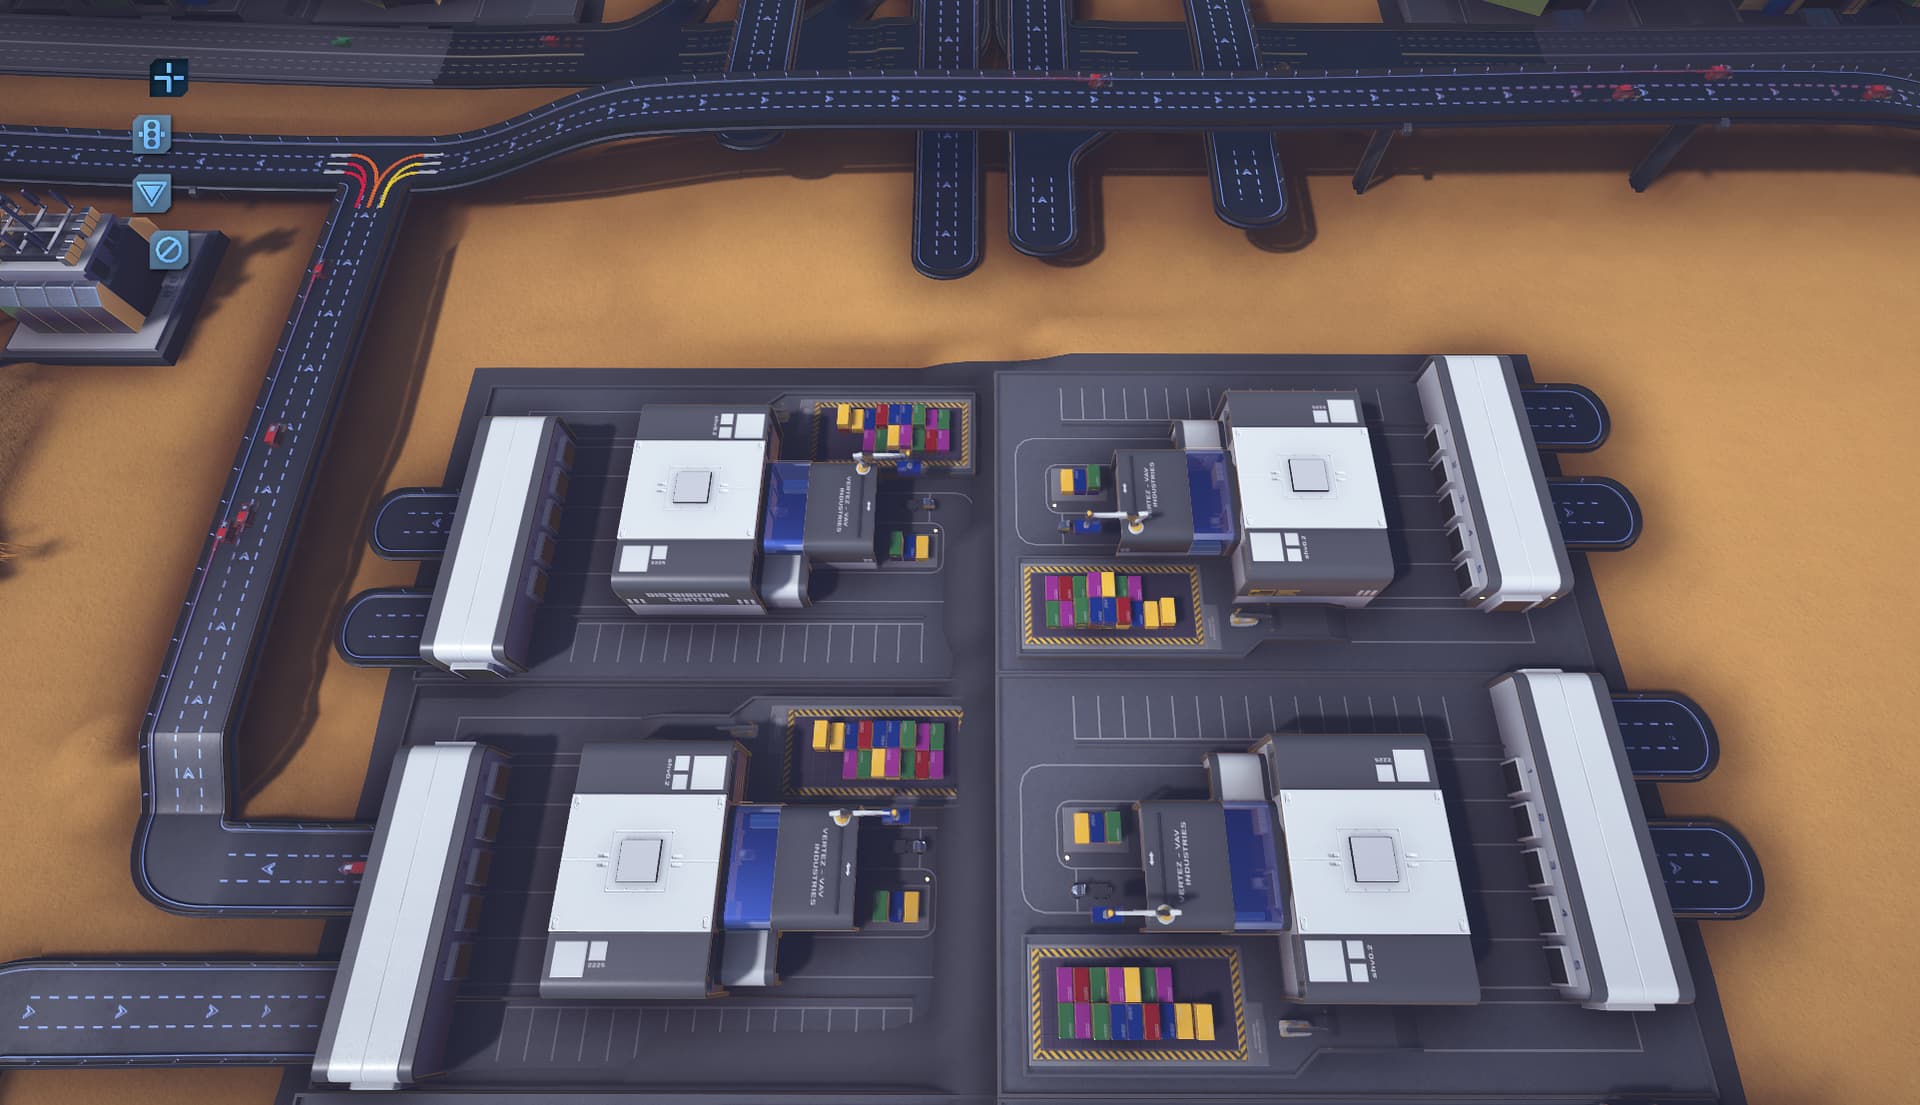
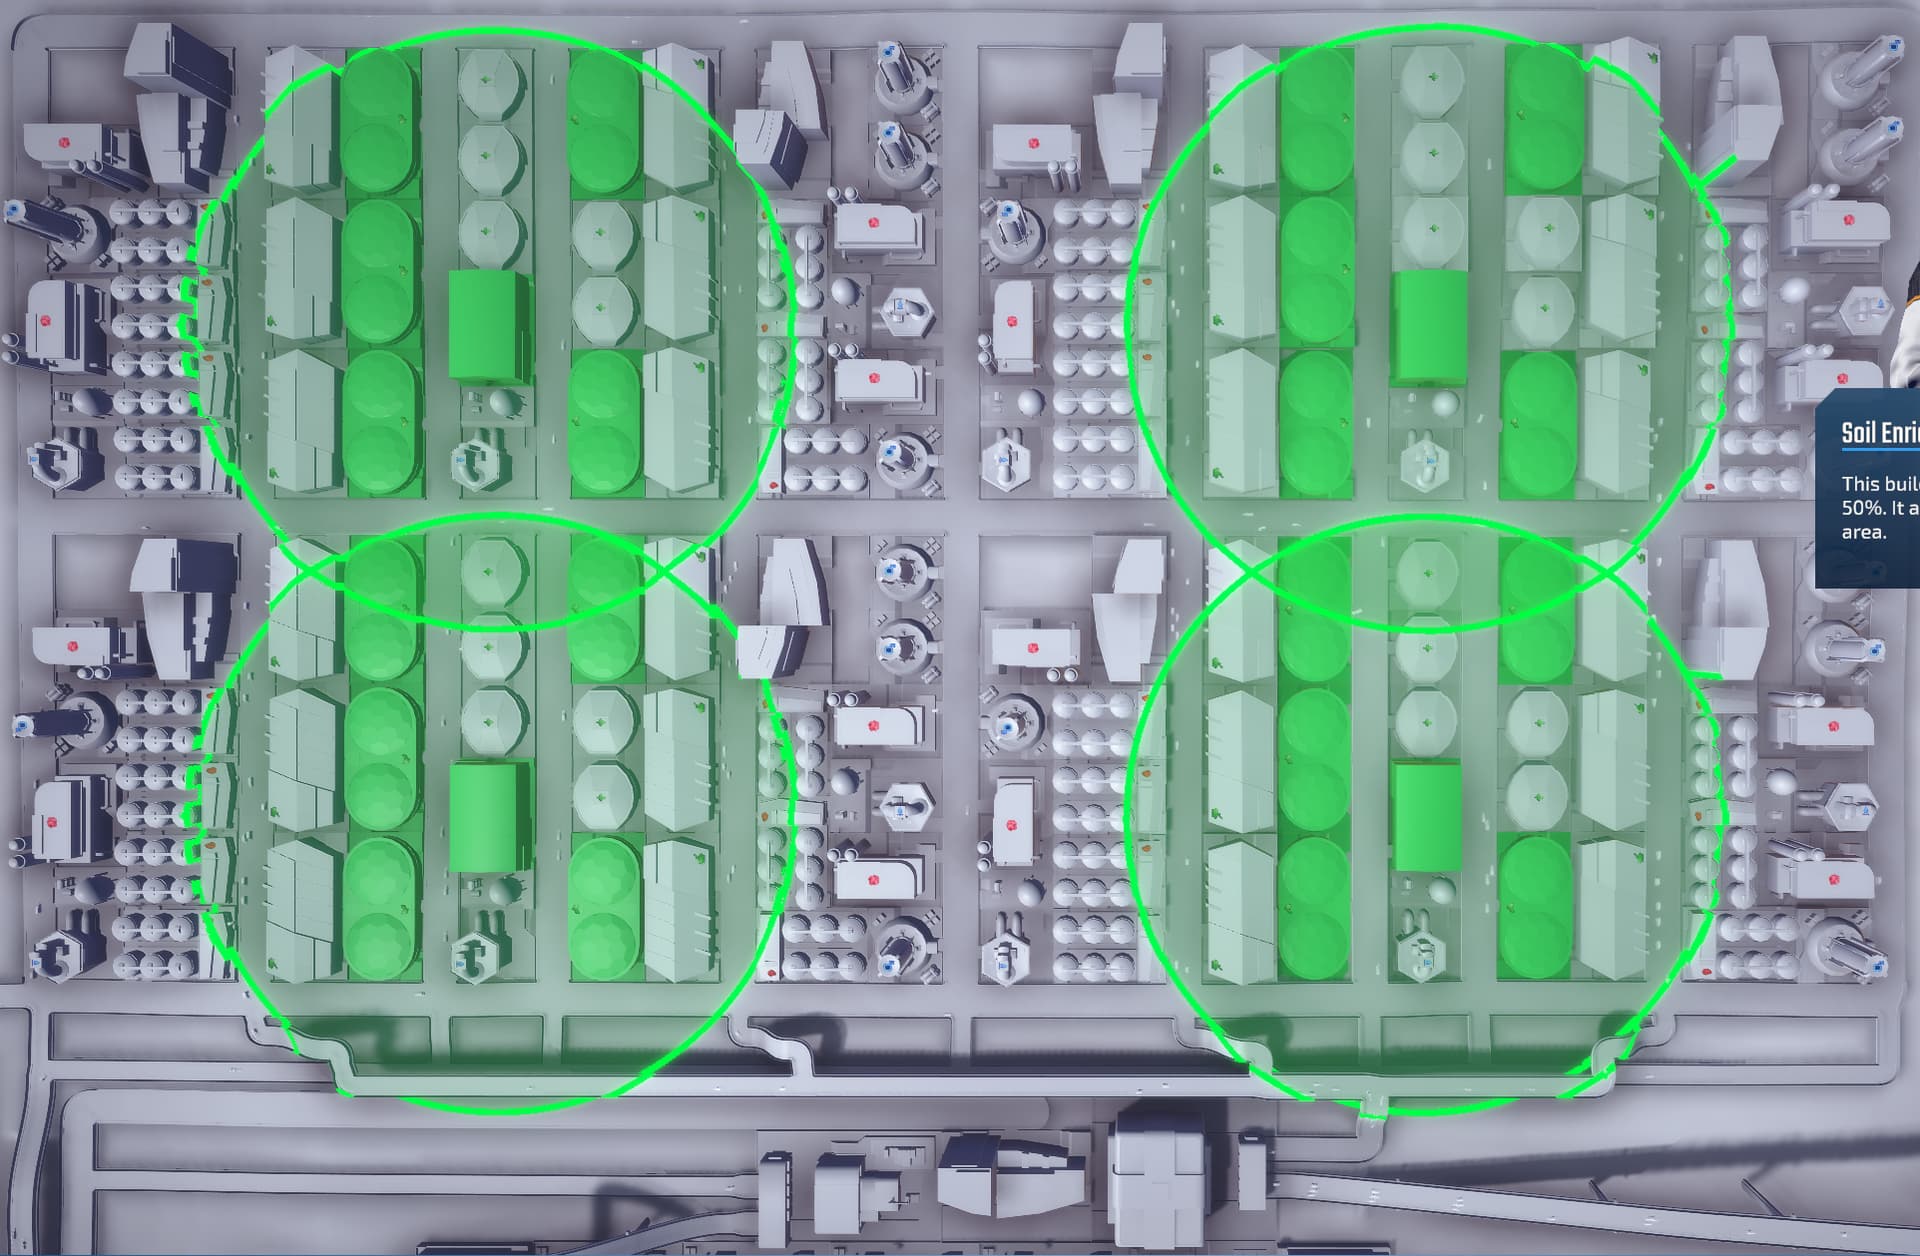
Soil Enrichment Facility reach:

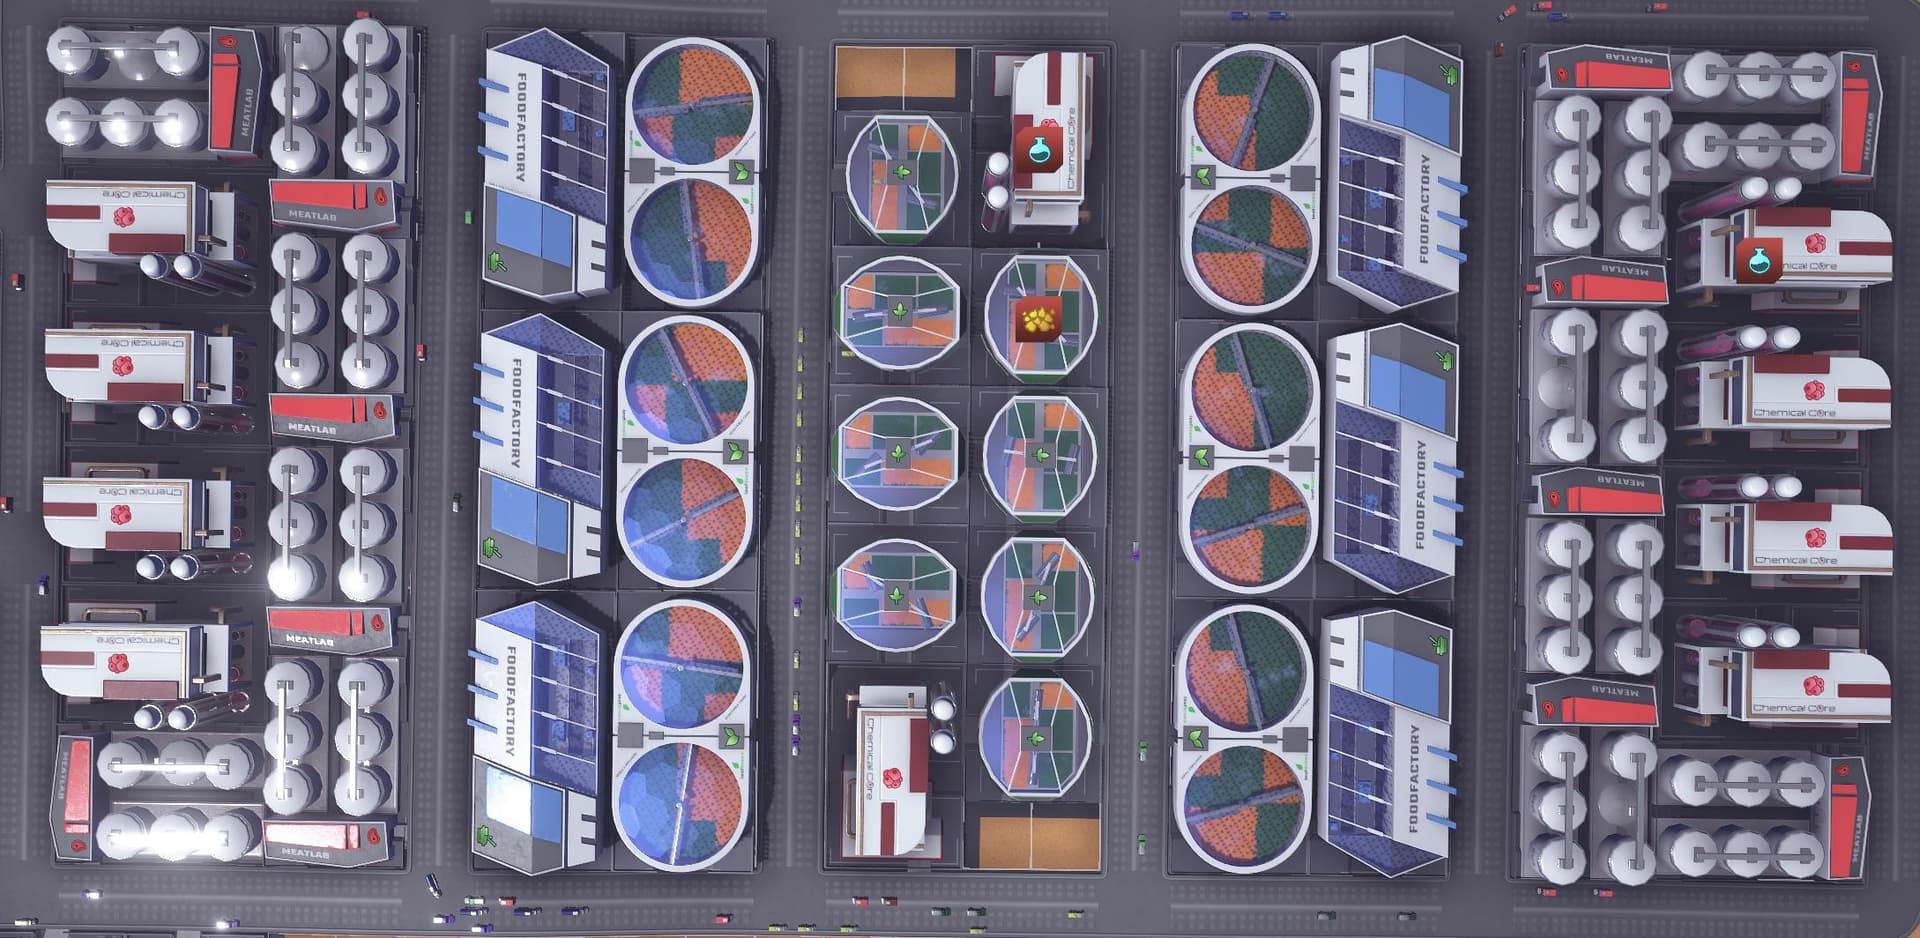
Direction of output/road connection for the Fertilizer Factories: (Intent is to have 3x Fertilizers on the left on the same road as the 3x Vegetable Farms on left, and 2x and 2x on the right. Trying to minimize the needed traffic outside of these left and right roads.)

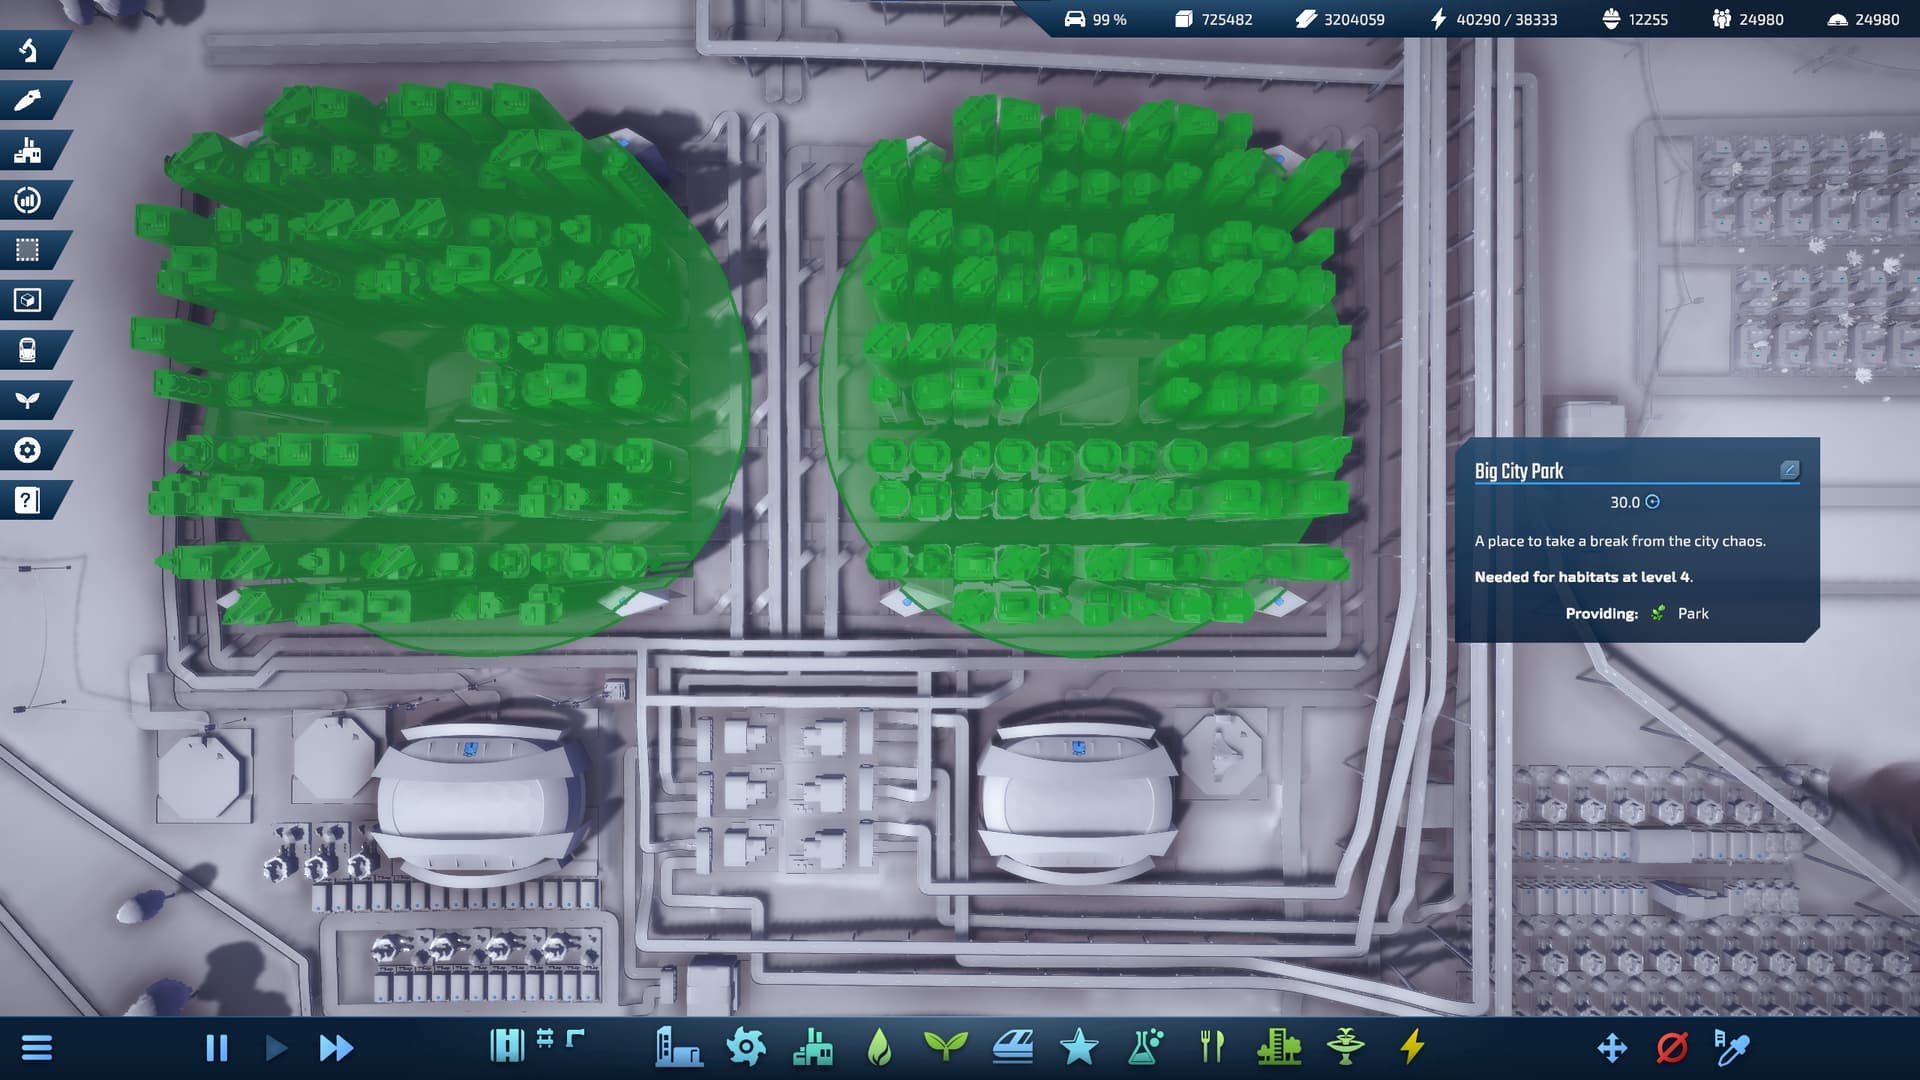
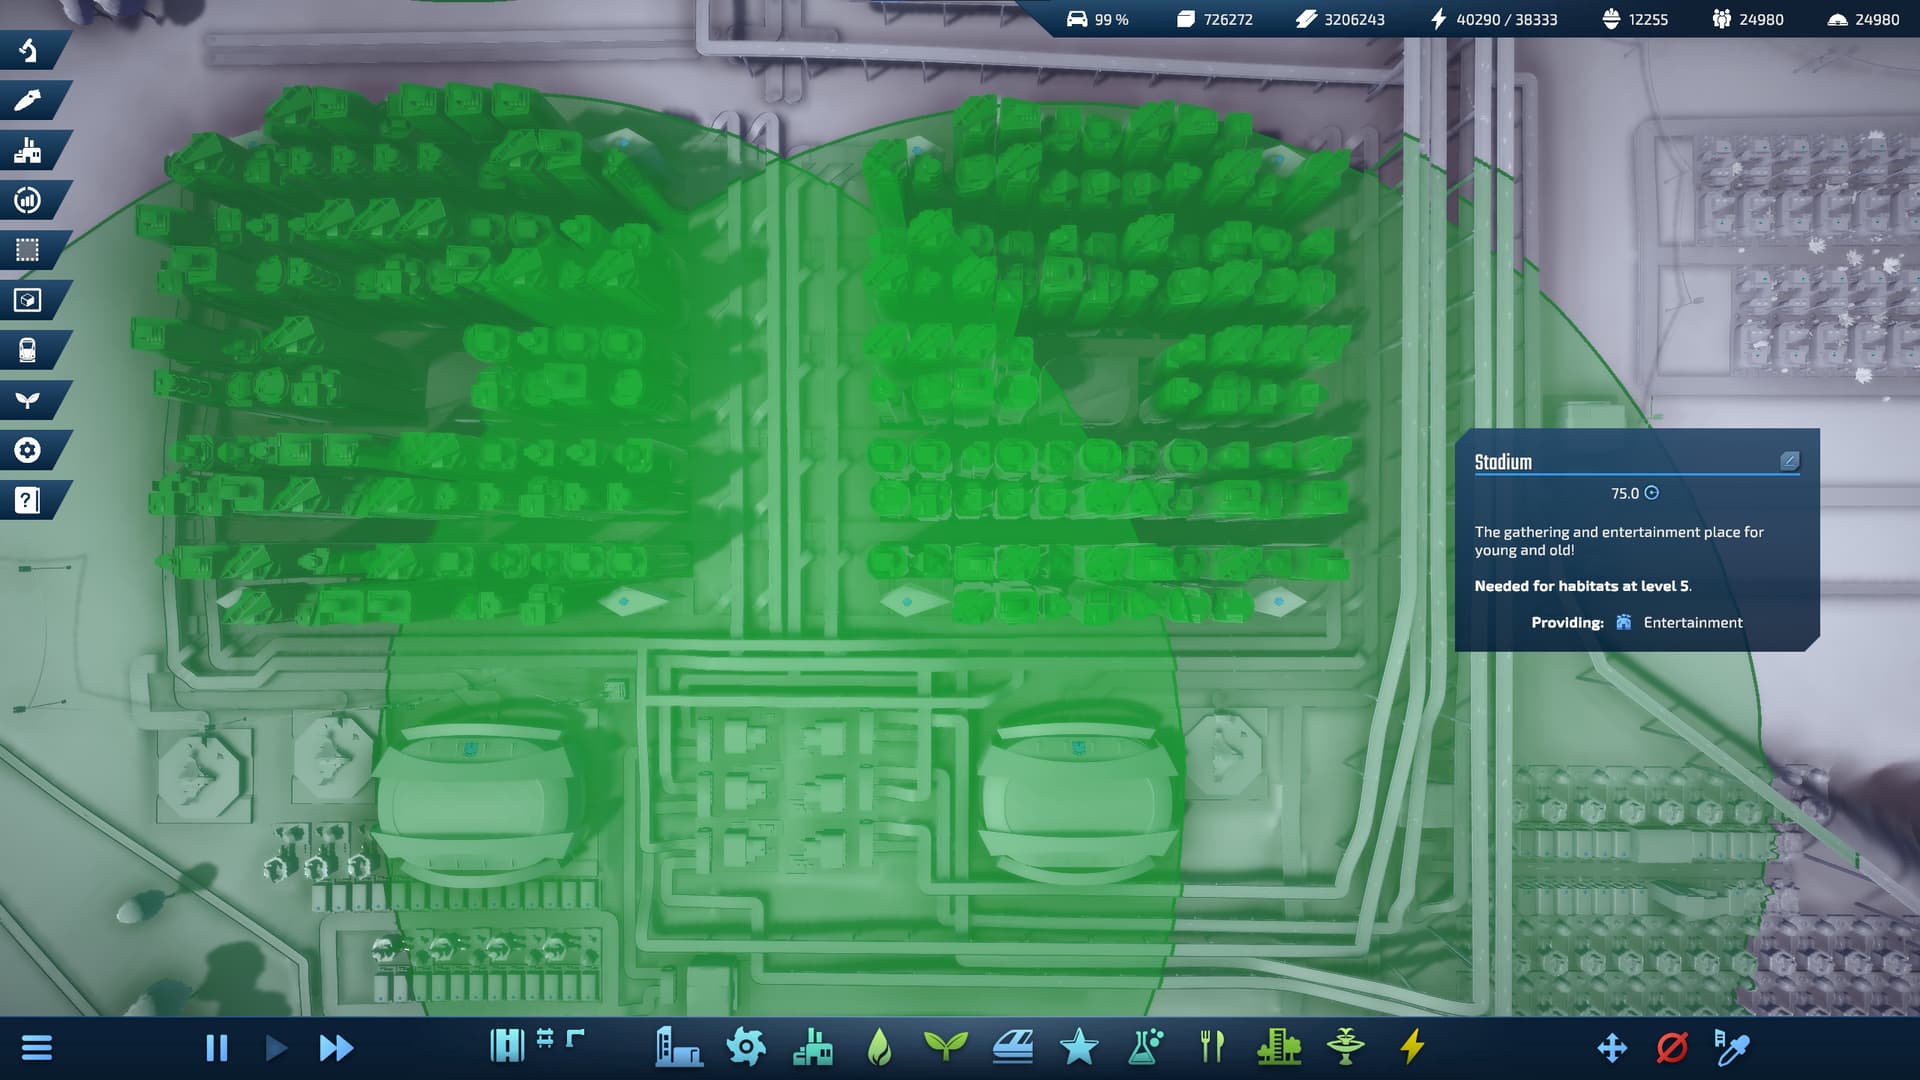
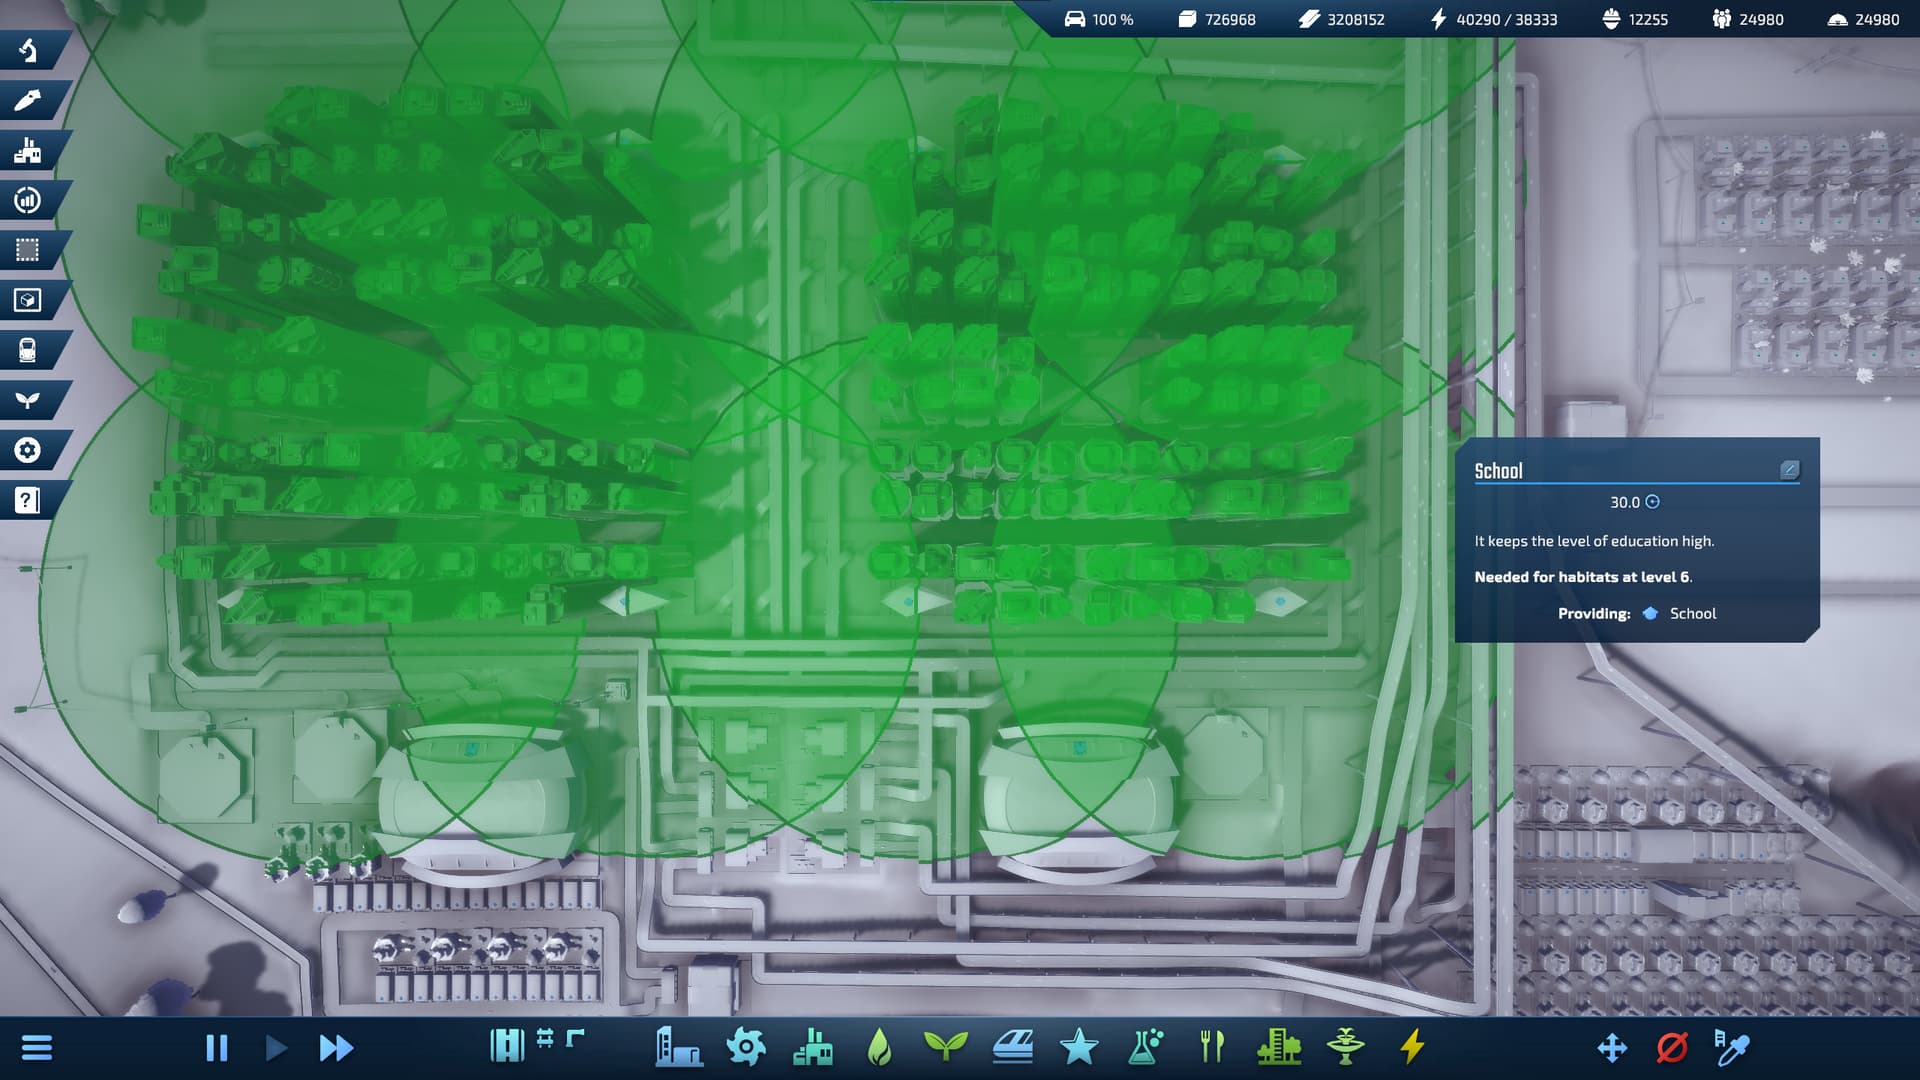
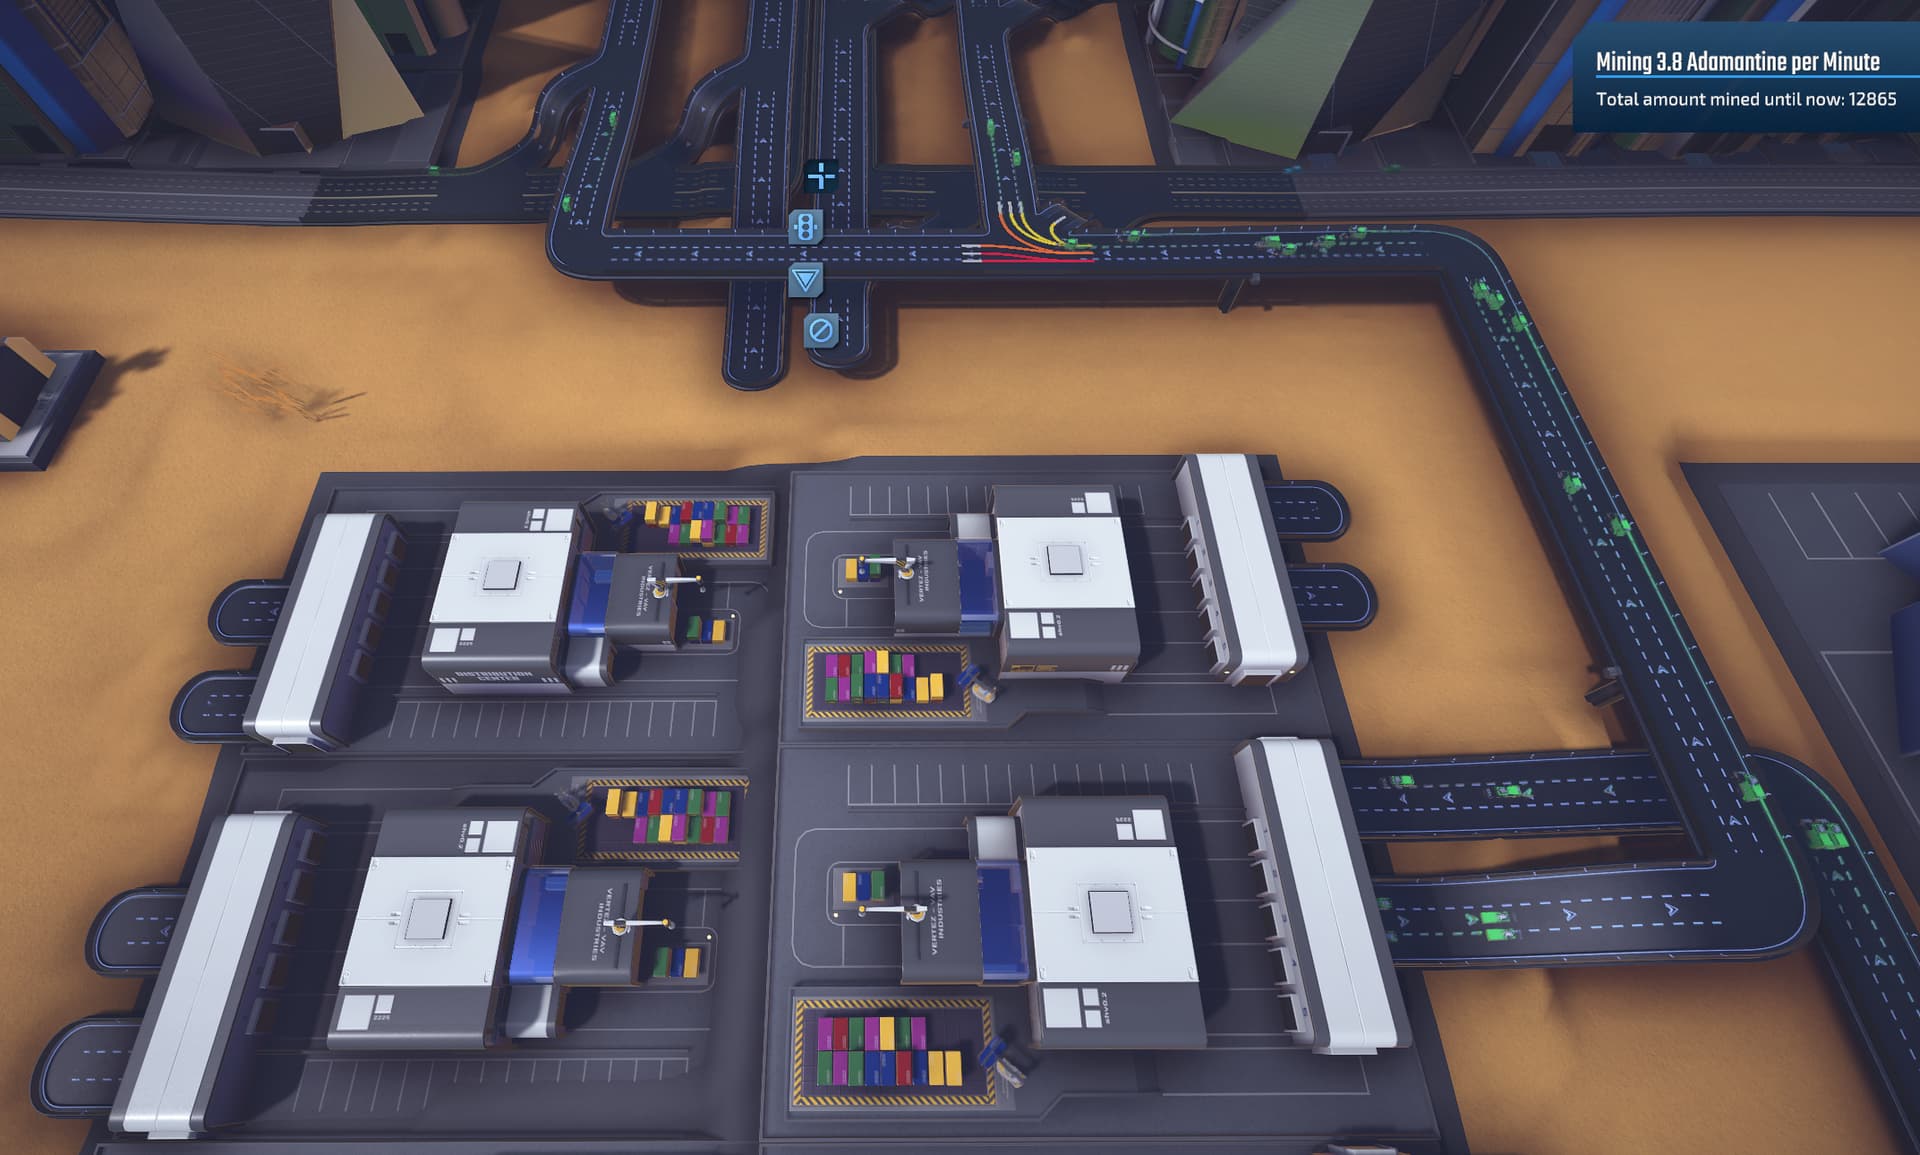
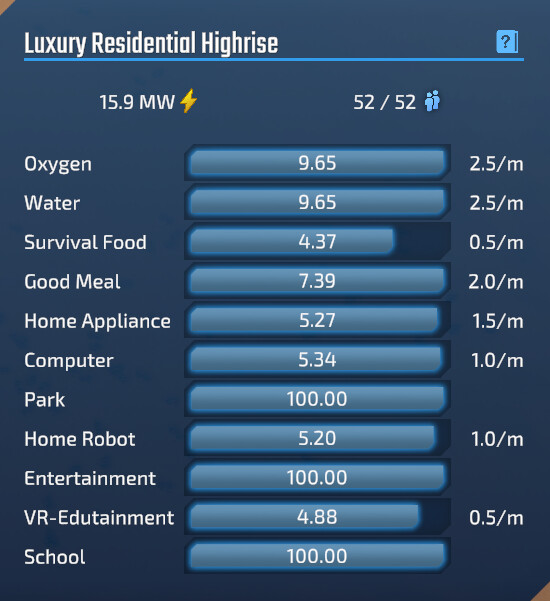
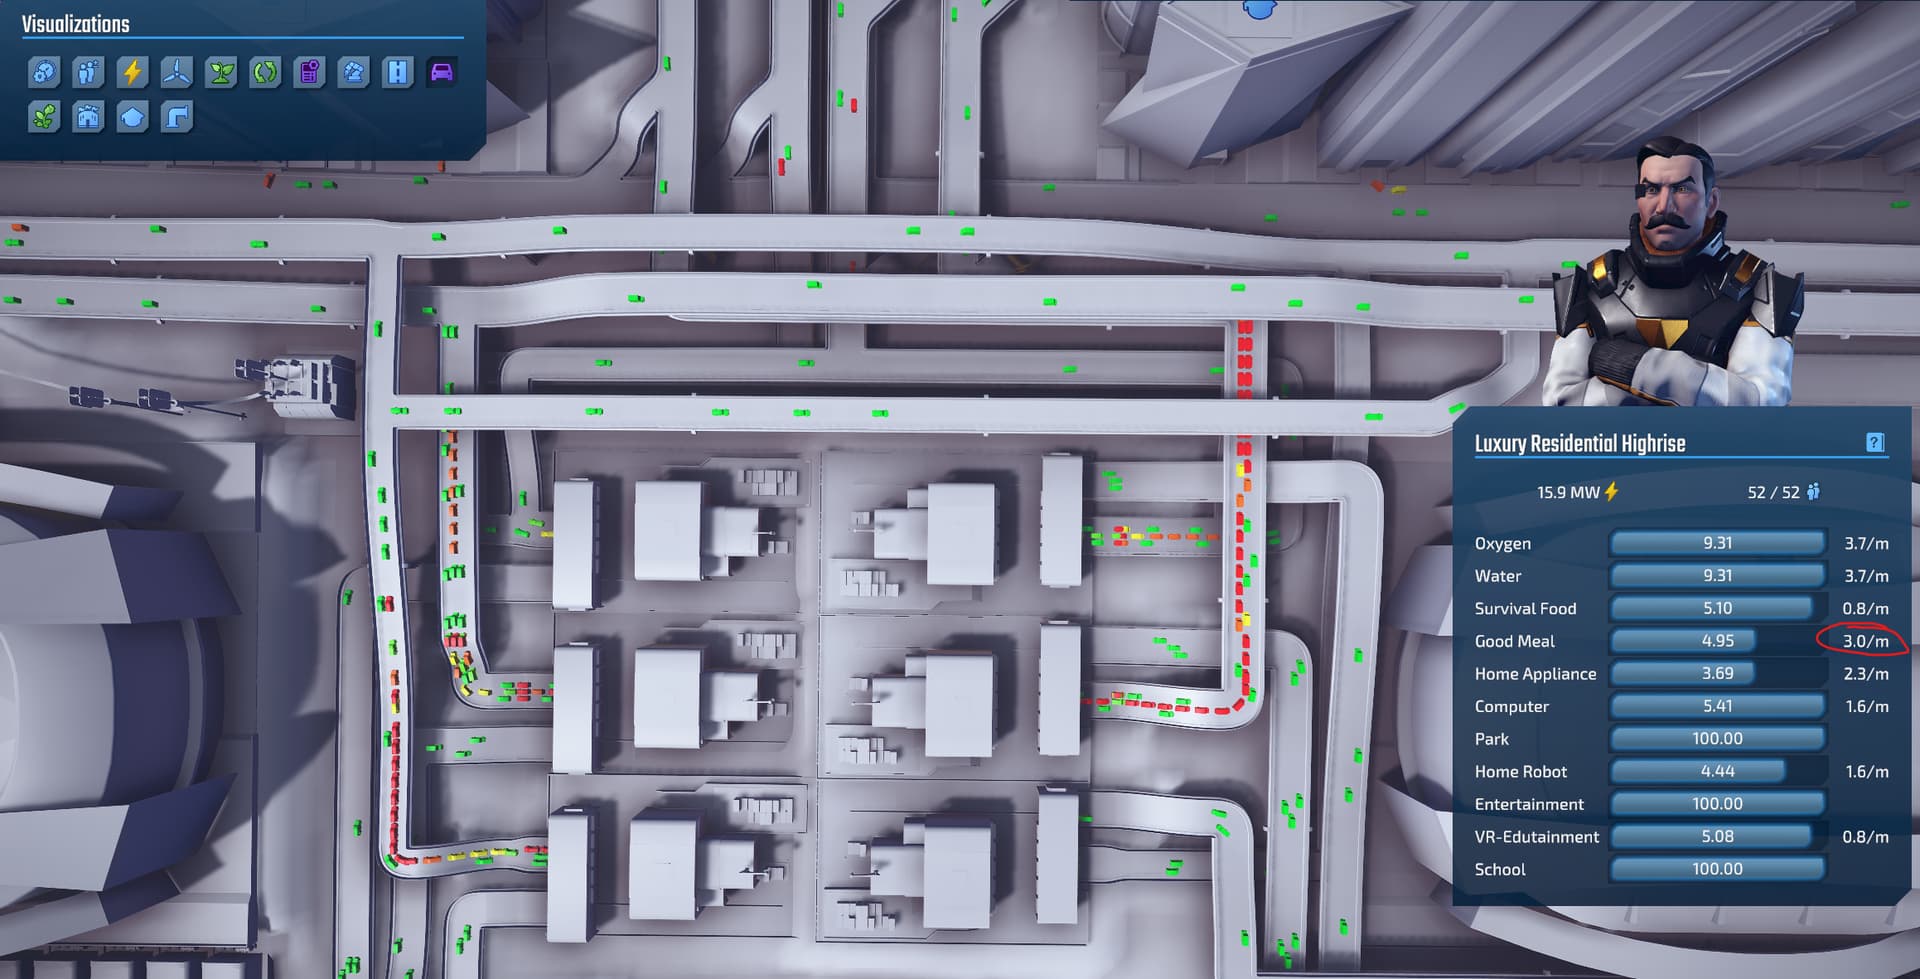
I have tested this layout without any pipes, so the traffic will work without gridlock without any pipes added (at least without round trip traffic enabled, I did not test with round trip enabled.) My current preferred layout for Habitat Zones are square blocks of 96 Habitat Units, and having 1 Distribution Center feeding 2 of these Habitat Zones for a total of 192 Habitat Units serviced per Distribution Center (for all required Habitat Resources, including Good Meals. So, 6x total Distribution Centers per 2x “Habitat Blocks”.) Population at max level Habitats (Luxury Residential Highrise) = 4,996 Colonists in 192 Habitats.

My main goal is to have enough Good Meals to feed 2x “Habitat Blocks” with their required minimum of ~380 Good Meals without any interruption (which is why I was fine with overshooting the production slightly @ ~410 Good Meals.) And second, to have the Good Meal production 4x blocks be as small and efficient as possible.

This current Meal Factory layout is the best I have gotten to so far, but is by no means fully optimized. Especially the placements of the Ground Water Extractors, Oxygen Processors, and Stem Cell Labs. Less so for the Meat Labs as they should be placed next to the Meal Factories. The placements for the Fertilizer Factories, Vegetable Farms, and Meal Factories are probably almost ‘perfect’ and unlikely to have much further worthwhile placement optimization (but I would love to see screenshots if you guys have a better idea for those too!)

Thanks for reading! I would love to hear or see any ideas or suggestions for optimizing this layout further or any better/more efficient Meal Factory layouts. Cheers! :beers:

1 Like

Here is extra info about my Habitat zone layout, none of this is required for the above Meal Factory layout post. Just thought I would add it here in case anyone would like to see in depth info about what I am doing right now with my Habitat areas:

My current preferred Habitat Layout:


Good Meal Distribution Center area:

Park Range:

Stadium Range:

School Range:

Further extra closeups of the Distribution road connections for those curious:

Some Distribution Center outputs are combined for traffic efficiency: (needed totals are based on max lvl Luxury Residential Highrise habitats, 192 total.)

Home Robots (200 needed) and VR-Endutainment (100 needed) [300 traffic total]
Survival Food (100 needed) and Computers (200 needed) [300 traffic total]
Home Appliances are on dedicated roads (290 needed)
Good Meals are on dedicated roads (380 needed)
Thus, most Superhighways have ~300 traffic (split in half to each of the 2x “Habitat Blocks”), with the only outlier being Good Meals @ 380 traffic. All outputs run on Superhighways until they meet the Highways, which then turn into Normal Roads at the last possible moment.

Distribution Center overall maze:

Superhighway to Highway to Normal Road connections: (The only only Highway connections are behind the Superhighway offramps to avoid the street/highway traffic from interfering with the traffic using the Superhighways–Superhighway traffic gets top priority to prevent traffic backups. Also why all other traffic is merged “left” around the Superhighway offramp traffic.)


Home Robots and VR-Endutainment routing:
(Note how the outputs from the Distribution Centers are 2 lane Superhighways, splits to 1 lane, then combines with the other Distribution Center’s 2 to 1 splits to become a 3 lane Superhighway. Preventing merging by going from 2 to 1 to 3 helps keep the traffic moving at max speed.)

Survival Food and Computer routing:

Home Appliance Routing:

Good Meal Routing:

This Habitat setup is not at maximum efficiency, for instance I think the 4 Superhighways between the 2x “Habitat Blocks” might be able to be combined, I just prefer NOT having the risk of Habitats downgrading all over the place lol. Also, there is probably a bit of extra space top/bottom/left/right where some extra Habitats could be placed, I just like the neat and tidy look of exact square zones, so I have not done much micro optimization of the Habitats themselves.

I like how you are posting actual tactics and solutions to the challenges of the game!

What are your exact difficulty settings? Only saw you are not using return trips. How about citizen demands and traffic or any other modifiers?

If you are playing on hard traffic difficulty then your traffic calculations are correct. If you are on any other difficulty then I think they may contain errors (although I didn’t check in detail). The reason is that trucks can transport more than 1 good at once, but this is actually different for some goods. There is something called Order Size. So to make sure your numbers are correct, you not only have to click the habitats and the factories (or production panel) but also the trucks of each product type.

Maybe I’ll post my strategy for hard + return trips that I used in my most recent attempt.

1 Like

Didn’t think to add the settings, thanks for asking! Will add the Difficulty Settings to the original post as well for anyone else reading through :smile:

Current Game Difficulty = Medium
Current Transport Difficulty = Medium

Ahhh, after looking through all my settings and the screenshots below, I see exactly what you mean! I will retest everything on Hard later and see if things still work :+1: Appreciate the questions and input @BaYoNeTTe!

Difficulty Settings:

Meal Factory readout:

Truck leaving Meal Factory:
image

Collection to Distro Center:
image

Distro to Highrise:
image

Luxury Residential Highrise resource readout:

2x Habitat Zone District Production Overview #1:

2x Habitat Zone District Production Overview #2:

LOL! “Houston, we have a problem”

Changed to Hard and Hard, and uh, there are gonna be issues with 1x Distro Center feeding 2x of my Habitat zones :rofl:

Cursory glance shows Good Meal requirements go from 2.0/min to 3.0/min, total changed from 379.4 to 569.1

Traffic Visualization:
(For anyone interested, the color coded Traffic Visualization is from @BaYoNeTTe’s mod “Car Speed Visualization”.)
@BaYoNeTTe’s Mod Page on this Forum: BaYoNeTTe’s mods
Steam Workshop Link: Car Speed Visualization

73% overall Traffic Flow (and still dropping…fell to the 50%'s eventually) :sweat_smile: /pain:

Meal Factory traffic:

Looks like Meal Factory output/collection MIGHT be possible with current road setup, however the input roads will absolutely need to be increased, possibly even routed to 4 sides to adapt.

My factories are not happy :smiling_face_with_tear:

“I CAN’T DRIVE…55!!!”

I might just start a new map on Hard+Hard here. I was also planning on posting some screens and info on my other Habitat Resource Factory zones, but yeah…they are gonna need some rework to function on Hard+Hard lmao.

Just for information, here are the numbers:

Inhabitant difficulty Consumption factor
Easy 0.67
Medium 1.0
Hard 1.5
Traffic difficulty Car capacity* Train capacity Gondola capacity
Easy 3 600 ?
Medium 2 400 ?
Hard 1 200 ?

I forgot the gondola numbers and can’t look them up right now, shame on me.

* car capacity is limited by the order size of a good. For home robots, computers and VRedutainment this is 1 for example (afair). So while the table looks like you will get twice as much traffic when switching from medium to hard, in reality it will be a bit less than x2.0. This is particularly true for habitat supply, which is that this thread is mostly about. For your good meals it will be correct though.

Also, return trips. If you enable them you will basically get twice as much traffic as before but this also has some caveats. Return trips only happen if there is a valid route for the car to take. If there is none then the return trip will simply be skipped but this has no influence on the forward delivery that comes before it. Some buildings don’t have exits so can’t send return trips. And you can engineer your city so that most return trips are impossible, making this challenge ridiculously easy. I’ve done that before and ever since I set myself the rule to make them possible wherever I can, otherwise there’s no point in using this setting. Bottom line: return trip roughly doubles traffic but in reality will be a little bit less than that.

Still I’d argue that return trips more than double the difficulty level. This is because of the way you have to design your infrastructure. It’s simply different from the normal game. The same scalable designs will suddenly fail to work. You have to do traffic flow and intersection in a different way and be much more careful. My experience at least.

So, if you go from normal/normal/no return all the way to hard/hard/with return, then the traffic for habitat supply will be roughly 6 times as much. It’s only normal that your current design will fall flat on its face :joy: I see so many people posting great cities on Discord, but (none?) of them would be even close to capable of handling the hardest challenge of this game.

1 Like

Good stuff! I do have a request – if you do any testing on Hard/Hard, can you pay close attention to how many bonus resources you’re actually getting after completing spaceship components? I have had an open thread where I seem to be getting fewer resources than I should, but nobody else seems to be having the issue and the devs have not replied. Thanks!

1 Like

I find this works quite well for me :slight_smile:

1 Like

This topic was automatically closed 30 days after the last reply. New replies are no longer allowed.